- Home Page
- Kite Plans
- Sodes
Sode-Kite Plans
For All the MBK Sodes
These sode-kite plans and hints are aimed at summarizing the more in-depth instructions to be found in the How To Make A Kite section of this website.
For the sode plans below, there are also a pair of plan-view photos.
The one on the left is of the front surface. That is, the side of the kite which faces the flier. The other photo is of the back surface, which exposes the spars.
For all three designs, attach flying line to the bridle with a shiftable knot for later trimming. Also, all three designs work well with light single-ply plastic for sail material. Many types of large plastic bags are suitable.
On this site, there's more kite-making info than you can poke a stick at. :-)
Want to know the most convenient way of using it all?
The Big MBK E-book Bundle is a collection of downloads—printable PDF files which provide step-by-step instructions for many kites large and small.
That's every kite in every MBK series.
Dowel Sode-Kite Plans
Plan-View Photos
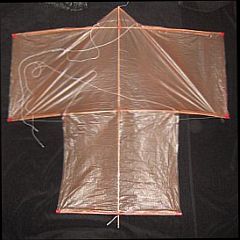 Front
Front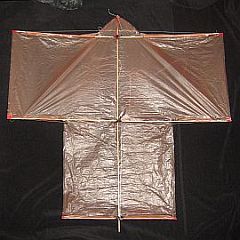 Back
Back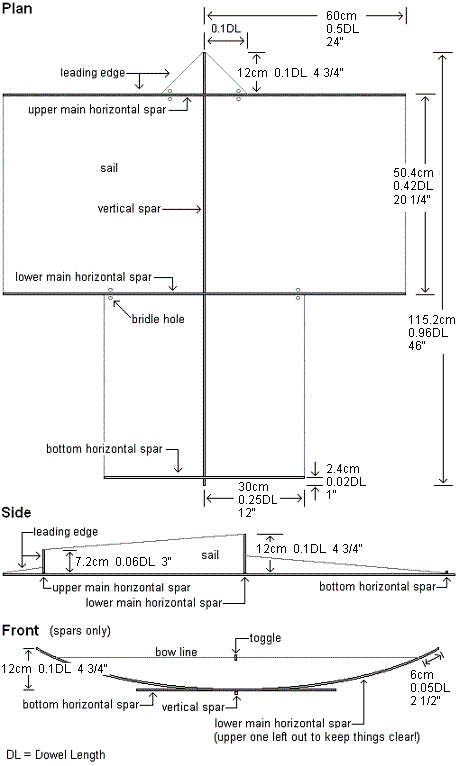
Tips and Hints
- For a dowel length of 120 cm (48 in.), 5 mm (3/16 in.) dowel works well.
- Reinforce the sail edges by adding nearly the full width of clear sticking tape inside the outline then trimming back to the outline.
- Secure the sail to each spar end using two short lengths of electrical insulation tape. One length goes over and around the tip, the other at 90 degrees to the first tape.
- For the bridle, try an upper loop of 1.0 dowel length and a lower loop of 1.5 dowel lengths. Connect the two loops with another 1.0 dowel length of flying line.
- To help keep the upper main horizontal spar in position, make a short loop of flying line. Lark's Head it to the middle of the bow line, and secure the other end to the nose of the kite. Do similarly for the lower main horizontal spar, putting the loop around the bottom tip of the vertical spar. Thus the two horizontal spars are tensioned away from each other.
- No tail is required for this kite if flown in light or moderate winds.
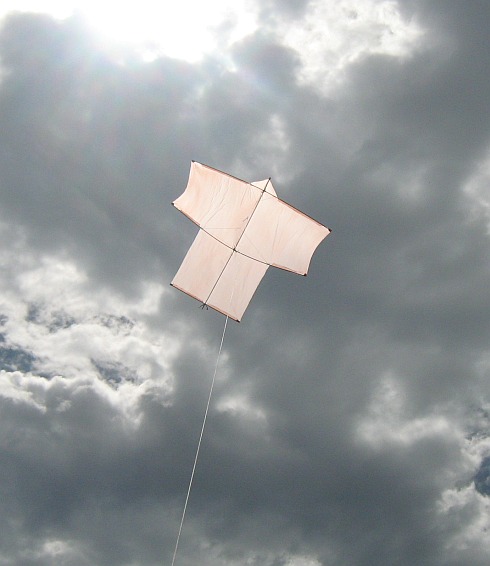 Super-steady or exhilerating mover, depending on wind
2-Skewer Sode-Kite Plans
Plan-View Photos
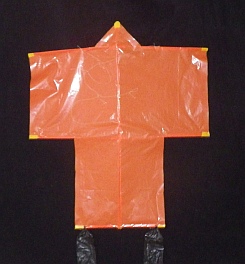 Front
Front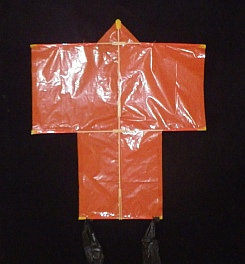 Back
Back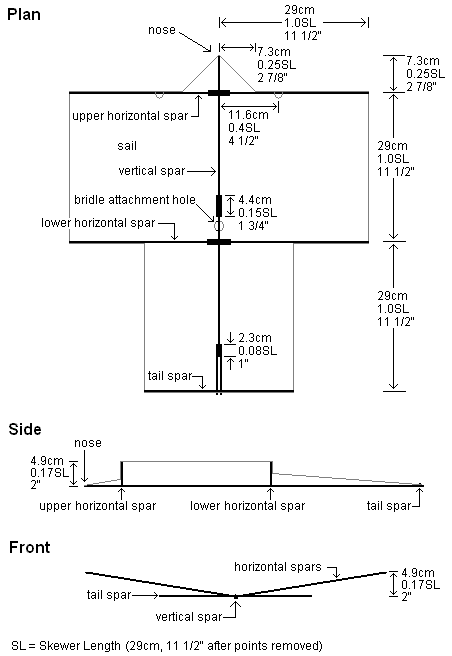
Tips and Hints
- Reinforce all the skewer joins with two lengths of skewer, 0.15 SL (4.4 cm, 1 3/4 in.) long, glued to both sides of the join as in the plan. While gluing the spars with dihedral, the short reinforcers stay flat on the table.
- Include tabs in the sail outline, to be folded
around the bamboo at the leading and trailing edges. Stick down with
clear sticking tape.
- Reinforce the sail edges by adding clear sticking tape over the outlines then trimming back to the outlines as you cut out the sail.
- Secure the sail to the spar ends, using short lengths of electrical insulation tape.
- Try a three-leg bridle, tied where indicated by the "bridle holes" in the plan. Keep the towing point as close to the kite as practical—roughly two skewer lengths from the sail.
- For a start, try making a tail about three times as long as the kite is high. Loop it from the bottom horizontal spar as in the photo below:
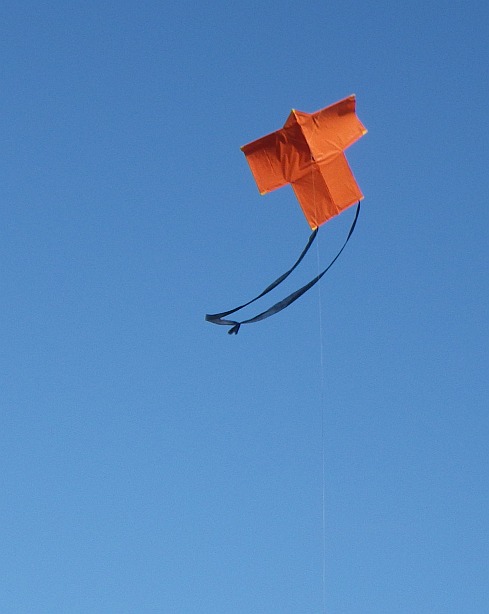 Delightful light-wind flyer
1-Skewer Sode-Kite Plans
Plan-View Photos
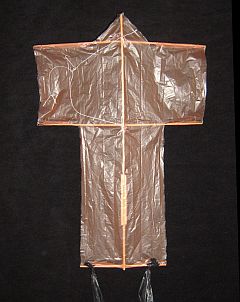 Front
Front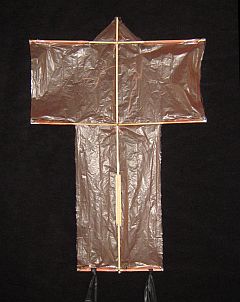 Back
Back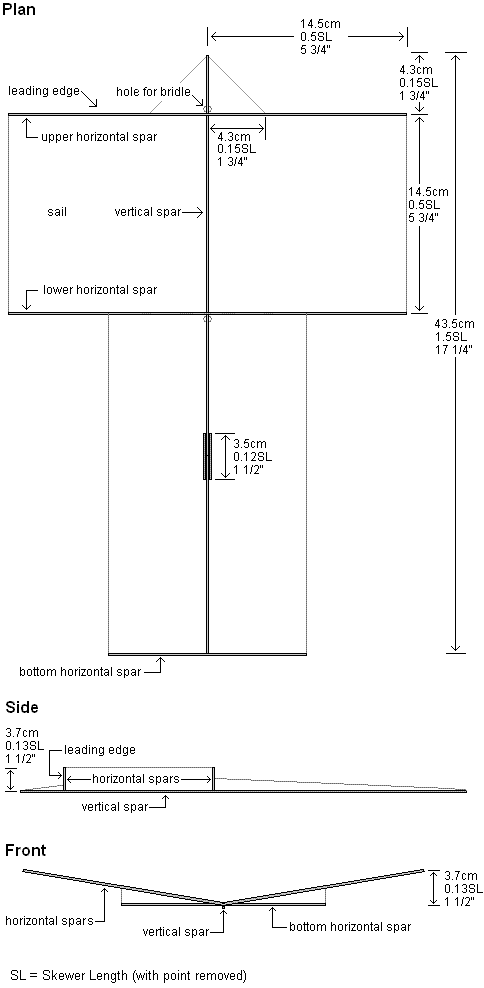
Tips and Hints
- Reinforce the vertical skewer join with two lengths of skewer, glued to both sides of the join as in the plan.
- Secure the sail to the spar ends using short lengths of clear sticking tape.
- Try a two skewer-length bridle line, tied between the upper and lower attachment points.
- For a start, try making a looped tail about eight times as long as the kite is high. Add more to let the kite fly in fresh winds.
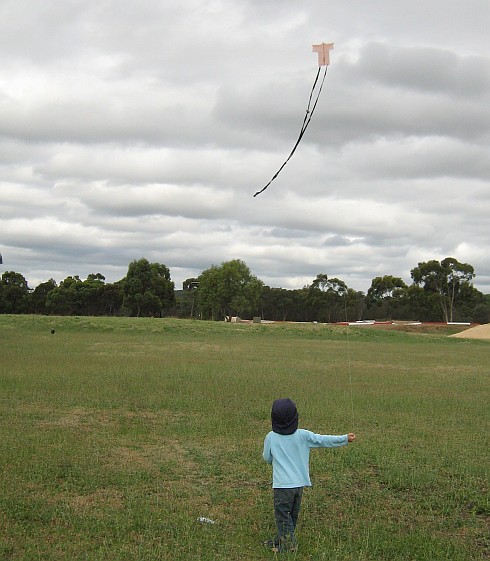 Nontraditional little sode, but great with enough tail
Out in the Field
Sode-kite stories of my real-life flying experiences are worth checking out!
Illustrated with photos and videos, of course.
I hope one of these sode-kite plans is just right for you!
As mentioned earlier, there's more kite making on this site than you can poke a stick at. :-)
Want to know the most convenient way of using it all?
The Big MBK E-book Bundle is a collection of downloads—printable PDF files which provide step-by-step instructions for many kites large and small.
That's every kite in every MBK series.
