- Home Page
- Accessories
Kiting Accessories, Materials
From the Hi-Tech to the Mundane!
We use a variety of kiting accessories to enhance our enjoyment of the
hobby—everything from sunscreen to the latest digital wind meter.
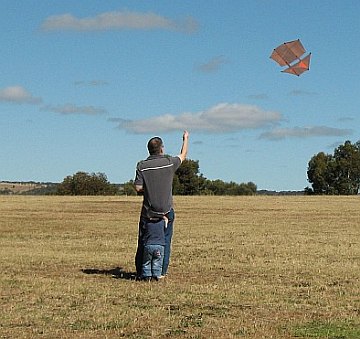 At least my son had a hat!
In fact, I've made a list in reverse order of excitement! From my "most precious toy" :-) right down to the utterly mundane.
I understand that if you were born after about 1985, you must be incredulous that something like a simple wind meter could possibly be "exciting." As in, "How could it compare to the latest X-Box, Wii, or 3D HD TV?"
Some of us kiters just appreciate the simple things in life.
Whether you like making your own kites or just buy them online, it doesn't make much difference to the accessories you need.
Some additional background info on the materials used in this hobby can be found near the bottom of this page.
Anyway, that list:
- Wind meter. This is not absolutely vital, strictly speaking. But it definitely adds to the fun, and I never go out without it!
- Digital camera. Occasionally, some beautiful photo opportunities come up. More often, catching some movement against a cloudy background makes for a nice kiting record, which tends to get more interesting with age.
- Length-marked line. It's interesting, and sometimes useful, knowing how much line you have out. Really!
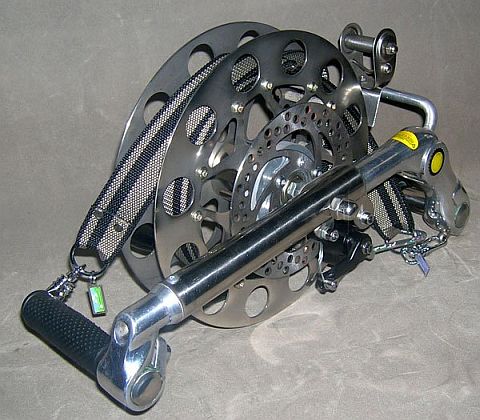
- Winder or reel. This is essential of course, but there is much choice available. Or make your own, as we do.
- Broad-brimmed hat. With the addition of a Legionnaire-style curtain around the sides and back of your head, this is just the ultimate in protection from the sun's rays.
- Sunscreen. It's essential in some climates.
Some of the sections below contain links to pages that contain all sorts of extra detail on the topics. Get a cup of coffee; you might be a while!
Wind Meter
It's most practical to use a wind gauge at rather close to ground level, since this just requires one of those short mini-tripods for cameras.
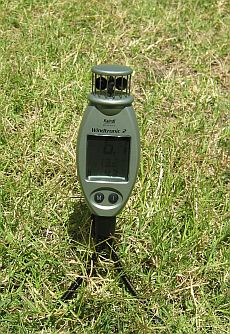 Our Windtronic meter
Of course, for a quick check, you can just hold it up at shoulder height for half a minute or so. Getting a rough reading like this allows you to accurately assess launching conditions. That's assuming you have done this enough times to figure out what wind strength suits your kite best! The reading for max gust strength might also affect your decision on which bundle to pull from your kite bag.
Although it's not always the case, the ground-level wind strength will often be somewhat lighter than the wind strength higher up. So by taking a reading at just above ground level, or at shoulder height, you can have a guess at what the wind is doing at 200 or 400 feet.
The difference between the average wind speed and the maximum gust strength is a measure of "gustiness." Around Adelaide, it's not unusual for winds to gust to more than 2 1/2 times the average near ground level!
I recorded wind speeds during nearly every decent flight, with my Windtronic 2 omni-directional meter. Hence there's probably an intriguing year-round picture of local wind conditions embedded in this site.
Although I never got around to it, it should be possible to take the meter up high to compare winds aloft with ground level! This could be done by launching on a full line length, allowing the meter to get to the desired recording height quickly. For the sake of accuracy, the descent would also need to be quite quick. That could be achieved by a short jog underneath the line while letting it slip through a gloved hand.
A 10-minute flight would probably be enough to keep the wind-strength average from changing too much due to the ascent and descent.
Finally, if you have ever had the urge to design or make your very own wind-speed meter, follow that link for some more ideas!
Digital Camera
Obviously, this would be the perfect companion for someone with a kiting website! But modern cameras make it easy for anyone with a photogenic kite or two to snap some great images. Flying contraptions don't last forever and occasionally get lost, but images tend to hang around a lot longer—particularly if posted on the Web! I'm not mentioning any website in particular.
Video is easy to take too, these days. I usually ended up zooming in quite a bit to get everything, including the tail, to fill the viewfinder. Panning around to follow the motion gets pretty automatic after a while. Most of this video would only be of interest to the owner. However, on this site, I have short clips to illustrate every kite design for which I have published instructions. Visitors tell me they appreciate actually seeing the finished craft in action. It would have to be more motivating than just seeing a still shot!
We eventually bought a Pentax WG-2 camera, and for several years I added aerial photos to this site as well. See them under the Aerial Photos section of this site.
A Length-Marked Line
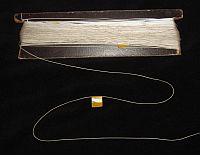
It's such a simple thing, attaching squares of insulation tape to a flying line, like little number-coded or color-coded flags. A good compromise between weight and usefulness seems to be spacing the flags at 30-meter (100-foot) intervals.
I did this for ages for my 20 pound, 50 pound, and 100-pound Dacron lines. After some practice, it gets easier to estimate lengths that lie between the flags. The main reason for doing this is to keep clear of the legal altitude limit. Of course, you have to also take into account the angle of the flying line!
A rule of thumb is that the altitude of something at 60 degrees is about 90 percent of the line length. Similarly, 45 degrees corresponds to 75 percent of the line length. Roughly! Of course, it gets easy if a thermal takes your kite right overhead. With 300 feet of line out, that means almost exactly 300 feet of altitude.
After many flights using marked lines, you get a feel for the ideal line length for each kite. For example, our tiny 1-Skewer designs tend to struggle a bit with more than 60 meters (200 feet) of line out. I guess the insulation tape markers didn't help! If you wanted to, you could make them very small, though, to save weight. In fact, we later went to just marking the line with a black permanent marker.
Winder or Reel
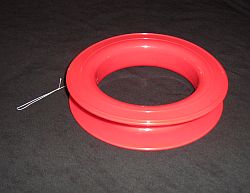
If you are only half-serious about getting out and flying single-liners, you soon realize that winding line onto a piece of stick just won't do!
A decent-size winder lets you gather line in at a fairly fast rate, so it doesn't take forever to bring a kite down or pack the line away.
This seems like a good spot to summarize the types of reels and winders used by single-line flyers:
- Wind-on, wind-off reels. These are simple reels that do a good job of storing the line but require you to take-in or let-out line one loop at a time. Line is often sold on such reels.
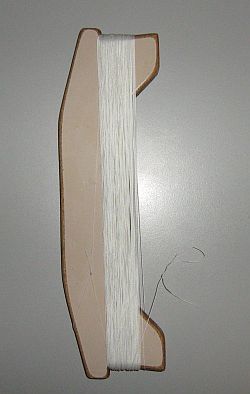
- Flat winders. These are simple rectangular winders that function just like those simple reels. They are often sold with small simple children's kites.
- Spinnable reels. These use the same principle as traditional Asian reels, where a spindle allows the flyer to rapidly let out line. Without too much tension in the line, it can be reeled in quickly too by spinning the spindle.
- Crankable, braked reels. These cost a bit more, particularly those that run on bearings! A crank allows rapid and positive winding of line in or out. The brake can slow the letting-out speed or even lock the line completely. Top-of-the-range models even feature a bell and a whistle. Just kidding!
A note about those simplest reels and winders. Some of these are designed for quick letting-out of line. For example, even our 2-Skewer designs are relatively small, and hence it's practical to let line out quickly by just letting it come off the winder as fast as the wind carries the kite away. The winder is designed to let the loops of line slip straight off, when the winder is held a particular way. Some circular reels operate in a similar way.
I just have to include this—a very handy idea emailed to me by a site visitor:
"Tim, I was looking at where I might get some material to make a winder like yours. Scrounging through my rubbish bin, I found an empty (smelly) 2-liter plastic milk bottle. Suddenly, it hit me, 'Why make something that looks good when for free I could use the plastic bottle (after washing it out)?'
I tied the line onto the bottle handle, wound the line around the bottle, anchored the kite end of the line under the cap, and best of all filled the bottle with water. Now, when I drop it I can catch up with it, because the kite doesn't fly away as fast as with an ordinary winder. As I'm an oldie, I need that sort of advantage.
Thought some other oldies might appreciate the idea. Thanks for getting me back into kites! I'm trying some of the ideas on kids after church."
-Bill C.
Regarding the fancier reels, here's some info on some kite reels manufactured in China.
Wind-Speed Handy Reference
Light Air
1-5 kph
1-3 mph
1-3 knts
Beaufort 1
Light breeze
6–11 kph
4–7 mph
4–6 knts
Beaufort 2
Gentle ...
12–19 kph
8–12 mph
7–10 knts
Beaufort 3
Moderate ...
20–28 kph
13–18 mph
11–16 knts
Beaufort 4
Fresh ...
29–38 kph
19–24 mph
17–21 knts
Beaufort 5
Strong ...
39–49 kph
25–31 mph
22–27 knts
Beaufort 6
High Wind
50-61 kph
32-38 mph
28-33 knts
Beaufort 7
Gale
62-74 kph
39-46 mph
34-40 knts
Beaufort 8
Broad-Brimmed Hat
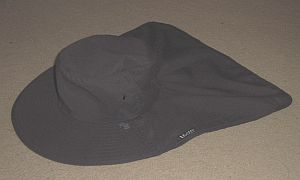
A broad-brimmed hat is recommended by the Cancer Council of Australia to protect your face, neck, and ears from harmful ultraviolet (UV) radiation from the sun. For almost complete protection, you can add a flap which flops over your ears and neck like a Legionnaire-style cap.
My son and I bought hats from a local Cancer Council stall, specifically for our kiting activities. A wide-brim with flap suited me and a suitably small Legionnaire cap for my young son. There's mine in the photo. It was nice going out to fly without the ... ahem ... burning question of "wonder if I'll get burnt today?" in mind.
If the look is somewhat unfashionable, what the heck—we're serious fliers aren't we! There's no point in suffering for your art.
Some years later we found an even better solution to the sunburn problem—the Kalahari hat. This design has a front visor (like a cap) but also a curtain which completely covers ears, throat, and neck when secured with a Velcro strip.
Sunscreen
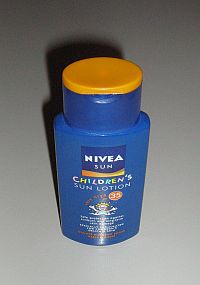
If the weather isn't very hot, then shoes, long trousers, and long sleeves protect just about everything not covered by the broad-brimmed hat. An exception can be a tiny spot at the bottom of the V neck of your shirt. I used to often come home completely unscathed except for a small pink patch right there! Solution: button up or rub in a bit of sunscreen.
With the head covered and wearing clothes that are shorter over the legs and arms, use sunscreen wherever you have ever got burnt. It's just common sense.
Here's a little-known point, but it's somewhat important:
On high-UV days, always wear sunscreen on your nose and cheeks, regardless of headgear. You see, UV gets reflected off sand, water, and particularly cumulus clouds. It will sneak under your wide-brim hat or visor and get you. :-| People have actually got burnt this way, despite spending all day in the shade!
For me, the straps on my sandals act like a stencil for extreme UV to make an artwork out of my feet! Again, sunscreen is the solution.
Severe sunburn can really spoil your kiting experiences. And that's not to mention other consequences later in life.
Kiting Materials
This info isn't so practical, but read on if you really want to fill out your knowledge of the things that kites or lines are made of.
Most designs these days use fiberglass rods for spars and spreaders and ripstop nylon for their sails. However, kites made from tissue or paper and bamboo for spars used to be much more common around the middle of the 1900s and before.
For single-liners, most fliers agree that Dacron line is best when taking cost into account.
Our own designs use cheap and widely available materials. The material lists are slightly different to suit either the dowel-sparred or bamboo-skewer-sparred designs.
Finding material for kite tails is easy with so many types of plastic bags around! Even with various bans in place, it should always be possible to find some plastic somewhere.
Other Miscellaneous Stuff
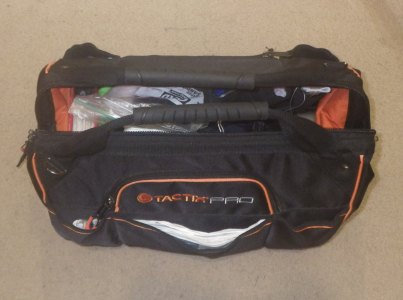
Are you curious about bags used in the hobby? Even if you're not, you might find the humble kite bag is not always so humble these days!
Finally, here's a general ramble on the topic of accessories. It covers a few different things that were never part of our family's outings.
