- Home Page
- Simple Kites
- Simple Sled
The Simple Sled Kite
Chilly High Flight on the First Outing
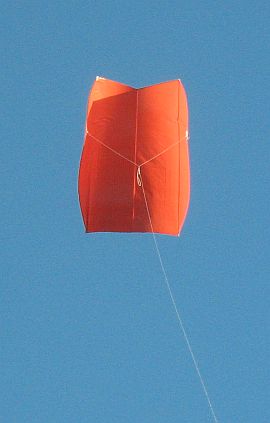
We were down at the usual large reserve with a spanking-new Simple Sled kite made from dark-orange two-ply-plastic garden bag. This was very expensive stuff compared to the cheap lighter plastic I used for the prototype a week or two ago. It must have been almost one dollar's worth. ;-)
 A sedate study in orange and blue
The weather was cool, almost cold, by Adelaide standards. I guess that would be more like a pleasant summer day in England or Canada.
The wind was almost calm at ground level, with just occasional light gusts blowing through. After two or three hand-launch attempts it was clear there was just not enough wind down low.
No problem. Tossing the winder on the grass, I moved downwind 20 meters or so, pulling the line off as I went.
Turning upwind again, it was easy to hand launch then jog slowly upwind while letting the line slip through my fingers.
By holding just enough tension in the line, the MBK Simple Sled climbed steadily to around 40 feet where it found the air unobstructed by trees and buildings. Since it was easily holding its height, we moved to a better position near one edge of the reserve to give the kite more room.
With a little more line let out and the kite flying nice and stable, it was time to get some photos to grace the How To page on the website—plus this page of course. Plenty of camera zoom was necessary, since the sled wasn't exactly low down, and it was a pity about the totally blue sky.
Kite pics are more interesting with a cloudy background! At least, today, the kite was illuminated from the side by the late-afternoon sun.
The Simple Sled kite with a somewhat heavier plastic sail seemed to be just a fraction less stable than the super-light prototype. However, it was still quite adequate. The heavier plastic is better for beginners, since it is much harder to damage in any way.
After the camera work was finished, it was quite straightforward to climb the sled all the way up to 400 feet. It was just a matter of letting line out several meters at a time then waiting for the line to tighten up for a few seconds, before repeating the process.
On this site, there's more kite-making info than you can poke a stick at. :-) Want to know the most convenient way of using it all?
The Big MBK E-book Bundle is a collection of downloads—printable PDF files which provide step-by-step instructions for many kites large and small.
That's every kite in every MBK series.
Aren, my 3-year-old boy, enjoyed seeing the little color-coded flags go out.
Yellow = 60 meters (200 feet), blue = 90 meters (300 feet), and finally black = 120 meters (400 feet). With the black flag out, the Simple Sled kite surged up to around 350 feet of altitude at one point, helped by a few scraps of rising air.
Line angles hovered at about 50 to 60 degrees as the MBK Simple Sled did its thing in the light-to-moderate breeze up around 300 feet. We let it stay up there for 10 minutes or so before starting the process of getting the kite down.
At last it was down to 40 feet or so, from where it promptly folded up and flopped to the grass! At that height, the wind couldn't even hold the sail open, let alone keep it flying.
So the MBK Simple Sled kite had a great first flight really. Never mind our cold hands as the air temperature drifted down.
No-one should have too much trouble making and flying this kite, unless perhaps there is way too much wind to fly.
The story or stories above document actual flying experiences. My write-ups are definitely "warts and all," since things don't always go totally as planned. However, half the fun of kiting is anticipating the perfect flight. When it happens, it's magic!
As mentioned earlier, there's more kite-making info here than you can poke a stick at. :-)
Want to know the most convenient way of using it all?
The Big MBK E-book Bundle is a collection of downloads—printable PDF files which provide step-by-step instructions for many kites large and small.
That's every kite in every MBK series.
