Origami Kite
How to Make and Fly
There is an origami kite-shape that is used as a base for many other origami creations. I actually tried using the base itself as a kite but was disappointed.
 Origami kite - it flies!
By overlapping the folded-in portions by just a few millimeters and holding them there with tape (tut tut!) a somewhat rigid structure resulted. With some tail and a thread flying line added, the result looked like a tiny diamond kite but proved far too heavy to be practical.
Another approach has been tried by others, which starts with the kite base but then folds out so just a single paper surface serves as the kite sail. This is my approach here.
I also use polyester sewing thread as flying line, due to its very light weight.
A light plastic tail is essential to give the folded square enough stability to maintain a positive line angle as often as possible. Otherwise, you can't really describe this paper craft as a kite :-)
Not everyone has access to actual origami paper, so this page describes how to use A4 or Letter size copier paper instead. Of course, if you do have origami paper, give it a try, because it holds creases so well.
On this site, there's more kite-making info than you can poke a stick at :-)
Want to know the most convenient way of using it all?
The Big MBK E-book Bundle is a collection of downloads—printable PDF files which provide step-by-step instructions for many kites large and small.
Every kite in every MBK series.
Materials, Tools
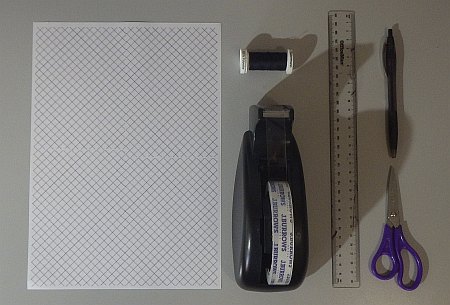 Left: materials | Right: tools
It's a pretty short materials list:
- one sheet of copier paper (optionally printed with an image or pattern on one side)
- polyester sewing thread
- sticky tape
And the same goes for the tools list: :-)
- ruler
- pen
- scissors
Making an Origami Kite
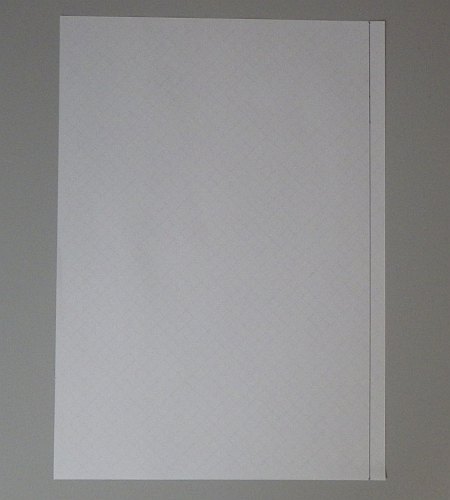
1. If you have a printed sheet of copier paper, flip it over to the blank side. From the top left, measure across 20 cm (7 3/4 in.) and make a mark. Do the same from the bottom-left corner and rule a line through the two marks as shown:
(The next two photos show A4—it will look a little different with Letter size paper.)
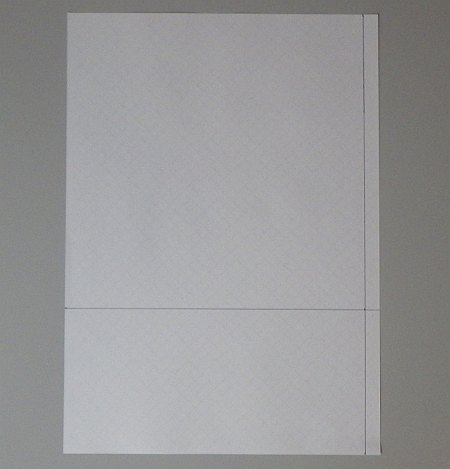
2. From the top-left corner of your paper, measure down 20 cm (7 3/4 in.) and make a mark. Do the same from the top of the ruled line. Rule a line through the two marks as shown:
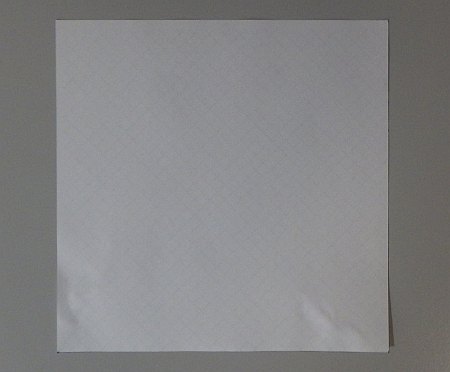
3. With scissors, cut along the ruled lines to cut out the square shape:
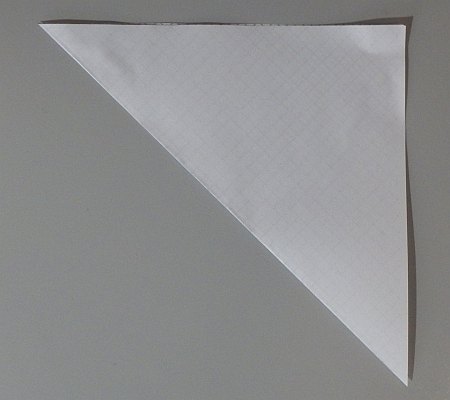
4. Fold the square in half along a diagonal, keeping the printed side (if any) on the inside:
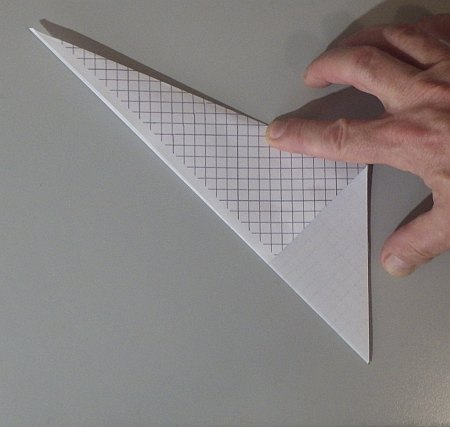
5. Fold both the corners back so the edges line up with the central crease as shown. One side is visible in the photo, the other is against the tabletop:
6. Fold the corners again so the edges line up with the previous folds as shown:

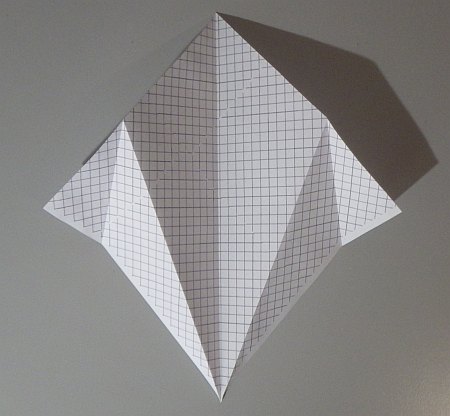
7. Pinch-hold the two corners and pull them apart. I've rotated the paper so the nose is at the top and the pattern is visible, as during flight. The paper will now sit with the folds half-flattened as shown:
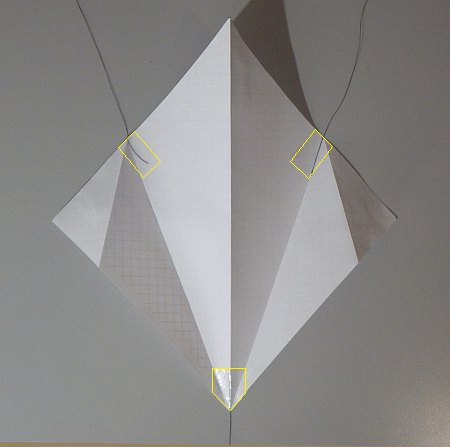
8. Cut three lengths of thread, each one 40 cm (16 in.) long. Stick one end of each piece of thread to the non-printed side of the paper with 3 cm (1 in.) strips of tape as indicated by the yellow rectangles in the photo:
9. Bring the three threads together and adjust them so the kite hangs level, but with the central crease dipping down at 45 degrees as shown. When happy with how the kite hangs from your hand, tie the strands together with a multi-strand simple knot:
 Tail dipping at 45 degrees
 Another view
10. Tie a long length (say 3 meters or 10 feet) of thread to where the three threads come together. That's your flying line :-)
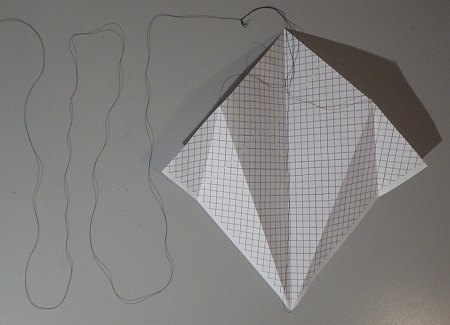
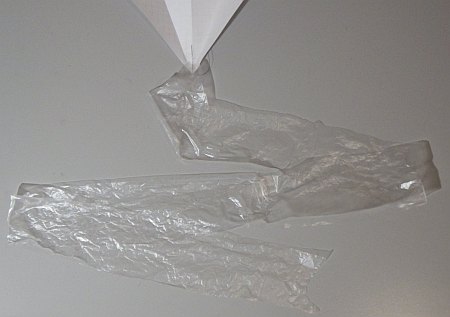
11. We're nearly there! Tape a 60 cm x 6 cm (24 in. x 2 1/2 in.) rectangle of thin plastic to the tail end of your origami kite as shown. Fold the corners of the plastic together first, so the tail better fits to the narrow tail-end of the origami kite:
Flying!
A breeze inside the gentle range is best for this origami kite. That is, when the air is moving at between 12 and 19 kph or between 8 and 12 mph.
Just dangle the kite from your hand, and let the wind catch it up. Let a bit more thread out if you can.
The video below was taken as a puff of wind came through our backyard. I took a few steps back to help things along, but there it is—it flies :-)
I hope you enjoyed creating your origami kite!
As mentioned earlier, there's more kite making on this site than you can poke a stick at. :-)
Want to know the most convenient way of using it all?
The Big MBK E-book Bundle is a collection of downloads—printable PDF files that provide step-by-step instructions for many kites large and small.
That's every kite in every MBK series.
