- Home Page
- Paper Kites
- Minimum Tetra
Make a Minimum Tetra Kite
A Paper Single-Cell Tetrahedral!
Presented here are a number of rather easy steps showing you how to make a minimum tetra kite. That's right—a very simple, single-cell tetrahedral. As such, the kite does require some tail, but I have ensured that the tail is also very simple and easy to make from paper.
After making an initial prototype from plain paper, I went out to the side lawn of our house and let the kite catch a gust or two as the breeze whipped through our yard.
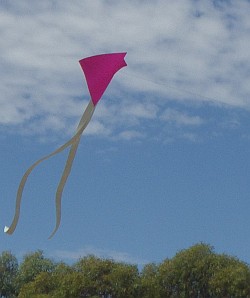 So cheap and simple—but it flies!
The design clearly needed a tail, so I ducked back inside and came out again with a generous amount of paper hanging off the lower corner of the sail. However, the kite still seemed rather limited in its willingness to climb and stay up. It was time to tweak the design a little.
After lightening and lengthening the rolled up paper cross-piece somewhat, the little kite started to behave! At a nearby grassy reserve, the tiny tetra proved that it would indeed fly well in gusty moderate wind.
So the only materials required for the tiny tetra design are:
- Two sheets of plain copier paper—A4 or Letter size.
- 18 mm (3/4 in.) clear sticking tape, preferably in a dispenser. Narrower tape should be OK as well if that's all you have.
- Any polyester sewing thread, preferably the lightest available. The lightest Dacron or nylon flying line you can get your hands on should also do a good job.
No joke, that's it!
The tool required is anything with a sharp point to poke a hole in paper. In fact, I got by with a ballpoint pen!
On this site, there's more kite-making info than you can poke a stick at. :-)
Want to know the most convenient way of using it all?
The Big MBK E-book Bundle is a collection of downloads—printable PDF files which provide step-by-step instructions for many kites large and small.
That's every kite in every MBK series.
Step 1—Make Sail
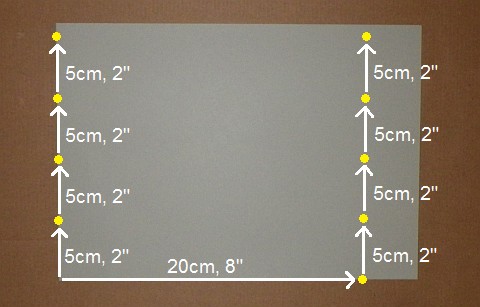
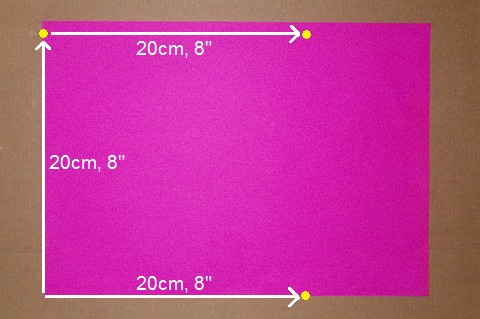 Measured and dots marked
- Select a sheet of copier paper in the desired color.
- Measure and mark dots as indicated in the photo. The dots have been enhanced in yellow to make them easier to see.
- A double check: Measure from the dot at top right, down to the dot below—the one on the edge of the paper. Shift the dot at top right a little, if necessary, to make the distance between the dots exactly 20 cm or 8 in.
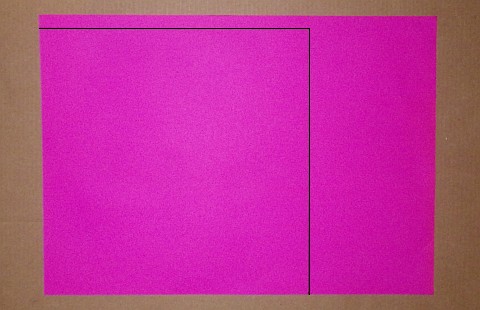 Lines drawn
- Connect the dots using ruler and pen. The lines have been enhanced to make them easier to see.
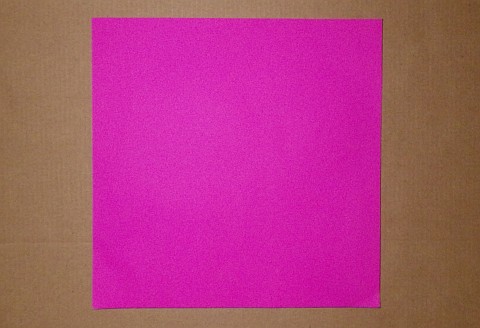 Square cut—keep the offcuts!
- With scissors, cut out the square of paper as shown. The sail's done!
Note: Don't throw away the offcuts! There's enough there to make the cross-piece, which is coming up later.
Step 2—Make Tail
 Measured and dots marked
- Select a sheet of copier paper in the desired color.
- Measure and mark dots as indicated in the photo. Precise measurements and squareness are not as important this time. :-)
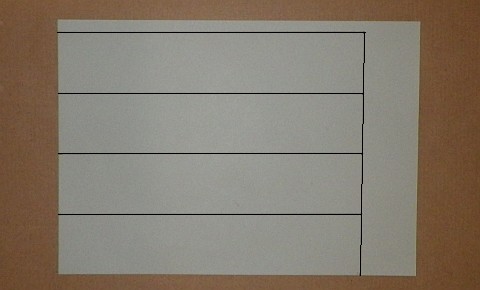 Lines drawn
- Connect the dots using ruler and pen. The lines have been enhanced in the photo to make them easier to see.
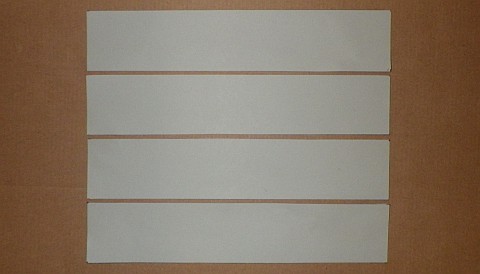 Rectangles cut
- With scissors, cut out the rectangles.
 Rectangles taped together
- Tape the four rectangles together, end to end and on both sides. A little overhang is OK; just fold any excess tape around to the other side. The tape position is shown in yellow on the photo.
Step 3—Attach and Split Tail
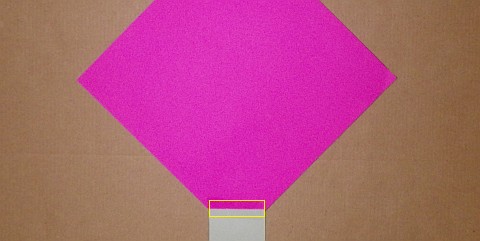 Tail aligned and taped
- Take one end of the tail, and line it up with one corner of the square sail as shown.
- Stick the tail in place. The yellow lines in the photo show where the sticking tape goes.
Like to see a video clip? Just scroll down to near the end of this page.
 Sail flipped
- Flip the sail over.
- Add another two short strips of sticking tape where shown. See how the overhanging corners of tape are folded around.
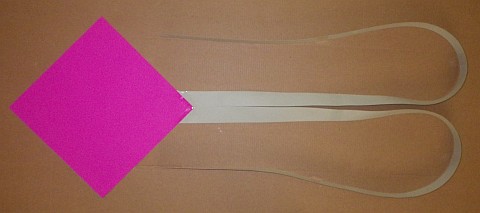 Tail split
- With scissors, carefully snip right down the middle of the tail. Go all the way to near the corner of the sail although that's hard to see in the photo.
- If you want to, go a little crazy and scissor cut a wavy or zigzag line instead! But keep the cutting near the middle of the paper all the way.
Step 4—Make Towing Point
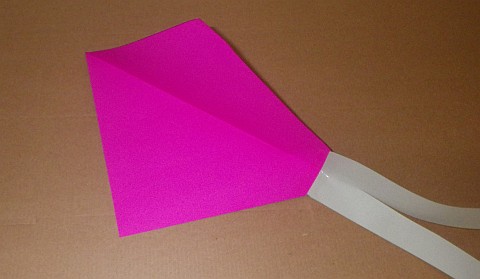 Sail creased
- First, crease the sail paper sharply from the nose-end corner right down to the corner where the tail attaches.
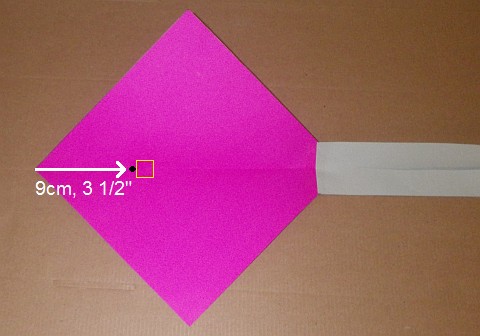 Towing point hole and tape reinforcer
- Measure 9 cm (3 1/2 in.) from the nose corner back along the crease, and make a hole in the paper at that point. See the black dot in the photo.
- Lay down a square of sticking tape so that the edge closest to the nose corner of the sail is right next to the hole. See the yellow lines in the photo.
- Lay down a second square of sticking tape over the first one. One wasn't enough after some hard flying I discovered!
Step 5—Make Cross-Piece
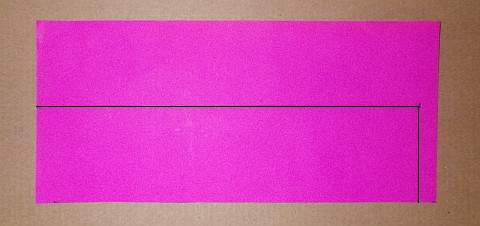
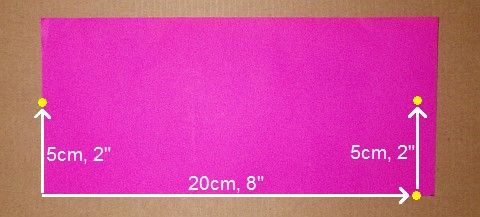 Measured and dots marked
- The offcut from making the sail should be big enough to use for the cross-piece.
- Measure and mark dots as indicated in the photo. Try to be reasonably accurate, as the strength and length of the cross-piece is what holds the correct sail shape in the air.
 Lines drawn
- Connect the dots using ruler and pen.
 Rectangle cut
- With scissors, cut out the rectangle.
 Rectangle folded/rolled up and taped
- Put a tiny fold all the way across a long edge. Then keep folding up the rectangle fairly tightly.
- Stop the paper from unfolding by wrapping a 3 cm (1 in.) length of sticking tape around the middle.
- Also wrap tape at four other places as shown by the yellow lines in the photo.
- The piece of folded paper is probably fairly flat, so squeeze it here and there until it pops into a more circular shape. Make it like a rod rather than a ruler! Rolling it between your hands can also help the shape become circular.
Step 6—Attach Cross-Piece
 Attached at one side corner
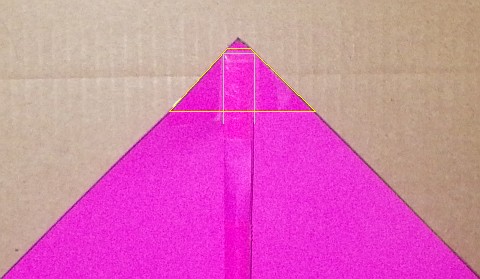
- Flatten the cross-piece at one end, and line it up with a side corner of the sail as shown in the photo. Skip down to the next photo for a moment if necessary! The end of the cross-piece is highlighted in light gray to make it easier to see.
- Secure the cross-piece in place with a 3 cm (1 in.) strip of sticking tape. Fold the overhanging corners of the tape around to the other side. See the yellow lines in the photo.
 Attached at both side corners
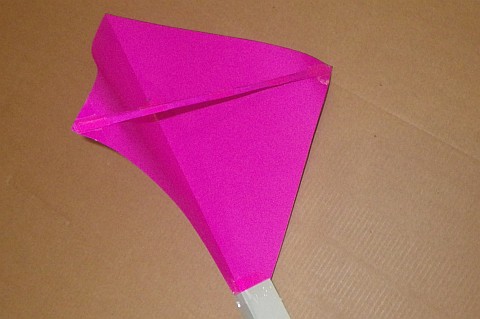
- In the same way, attach the other end of the cross-piece to the other side corner of the sail. See the photo.
Step 7—Attach Flying Line
You have pretty much finished learning how to make a minimum tetra kite at this point!
Assuming you have some polyester sewing thread wound onto something already:
 Thread poked through and taped
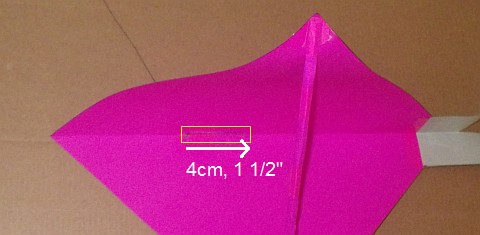
- Unwind a short length of thread and poke the free end through the hole in the sail as shown. One way to get started is to lay the thread across the hole then poke a pen or pencil tip through—taking some thread with it.
- Pull 4 cm (1 1/2 in.) of thread over the square of tape next to the hole.
- Stick down the thread with enough tape to cover the hole and all the thread. See the photo, which shows the position of the longer piece of sticking tape. The hole is on the left.
Step 8—Flying!
That's the kite all done and ready to fly. All that remains is to go out when there's a fair amount of breeze and watch the little tetra do its thing! It might float steady or zip around depending on the strength of the wind.
Out in the Field
Diamond-kite stories of my real-life flying experiences are worth checking out!
Illustrated with photos and videos, of course.
I hope you have enjoyed learning to make a minimum tetra kite this way. Now, regarding flying:
You will need to wait for winds of between 12 and 28 kph (8 to 18 mph) for best results. The kite will be easiest to launch down at a beach—but don't get it wet!
You will do best if you use ordinary polyester sewing thread for the flying line.
There's a video further down of the completed kite in lurid purple paper. At least it's easy to see.
As mentioned earlier, there's more kite making on this site than you can poke a stick at. :-)
Want to know the most convenient way of using it all?
The Big MBK E-book Bundle is a collection of downloads—printable PDF files which provide step-by-step instructions for many kites large and small.
That's every kite in every MBK series.
