- Home Page
- Better Kites
- ... Delta Kite
How to Make a Delta Kite
Step by Step—Page 1 of 4
The MBK Dowel Delta
This set of instructions on how to make a delta kite assumes you know absolutely nothing about kite making. You might already have some of the simple tools and materials required. Anything you don't have is easily bought. If it's not exactly what I used, then at least something pretty similar!
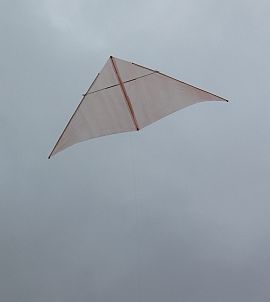 MBK Dowel Delta
These instructions might look quite detailed. However, your reward is an impressive but quite cheap kite that looks almost birdlike in the air.
Watch real birds fly in for a closer look, at times!
This delta is a tailless design that is 0.8 DL (96 cm, 38 1/2 in.) tall and has a wingspan of 2.0 DL (240 cm, 96 in.). Like traditional deltas, this kite has a floating spreader which keeps the leading edge spars apart.
This design is a very-light-to-gentle-wind flier.
The MBK Dowel Delta is designed to fold down to a slim cylindrical package like a sled, thanks to the removable spreader. Setting up on the flying field takes just a couple of minutes.
Of course, if you have enough room in your car, you can always leave this kite ready to fly.
I have chosen to make "One Dowel Length" equal to 120 cm for every kite in the Dowel Series. If you are in North America, 48 in. of 3/16 in. dowel is close enough to 120 cm of 5 mm dowel. This will result in a kite with similar flying characteristics to my original. Make sure to find a hardwood type for your dowel.
On this site, there's more kite-making info than you can poke a stick at. :-)
Want to know the most convenient way of using it all?
The Big MBK E-book Bundle is a collection of downloads—printable PDF files which provide step-by-step instructions for many kites large and small.
That's every kite in every MBK series.
How to Make a Delta Kite
Cutting the Sail
Now's the time to read up on the kite-making tools and materials required for making a Dowel Delta, if you haven't already.
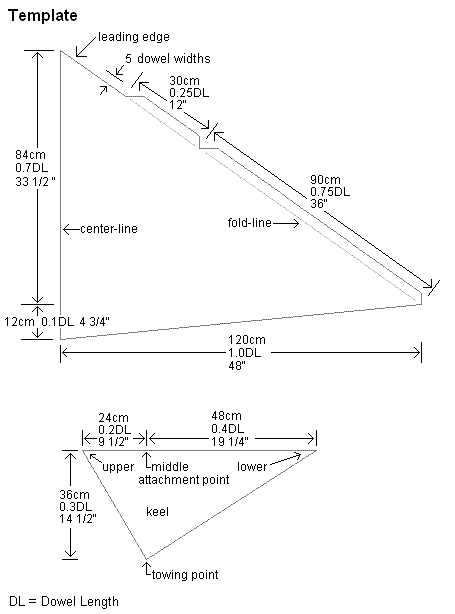
The template shown above represents one side of the kite sail. You will now transfer these measurements to the sail plastic.
Note: Although it's based on 120 cm dowels, the delta design means the total wingspan is a lot more than that. Hence two garden bags are required—one for the left side of the sail and one for the right.
Hint: To mark long lines with a short ruler, try the following:
- Run a piece of flying line along the entire length, and keep in place with a weighty object at each end.
- Pull a little line through to ensure it is under tension hence perfectly straight.
- Mark dots under the line at intervals slightly shorter than your ruler.
- Remove the line and weights.
- With ruler and pen, join the dots!
Like to see a video clip? Just scroll down to near the end of this page.
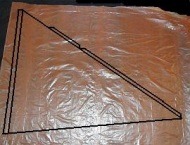
- First, take one large bag that you want to use for the sail, cut it down one side and along the bottom, and lay it flat on the floor.
- Mark dots on the plastic that correspond to the top, bottom, and wingtip corners of the template. Leave a margin of several centimeters (or inches) between the centerline and the edge of the plastic.
- Using the marking pen, rule those three long lines.
- Starting from the wingtip, measure along the leading edge line, and draw in the tabs. The short lines can be done by eye, but just make sure the tabs are at least five dowel widths (diameters) wide.
- The left side of the plastic might be a bit ragged. So draw another black line next to the center line, all the way from top to bottom, about 2 cm (an inch or so) away from the centerline. Now draw short horizontal lines connecting to the top and bottom of the template as in the photo.
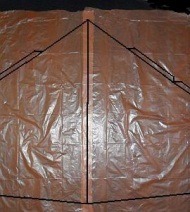
- Only half the sail has been outlined. Take another bag, cutting it and laying it flat over the top of the first bag. There's no measuring to do now, just trace over all the black lines, making sure nothing shifts as you do each line.
- Using scissors and doing one line at a time, cut along the long lines near the centerlines—all the way from top to bottom of the plastic sheets.
- Flip the second plastic bag over and align the centerlines of both template shapes. Tape down both joins with clear sticky tape, all the way from top to bottom. One join will be facing you, the other facing the floor. The center section is darker, since it is where both sheets of plastic overlap.
When doing the following, most of the width of the tape should be inside the kite's outline. Use just one or two lengths of tape for each line. Hold it out straight; touch it down to the plastic at one end then at the other end; dab it down in the middle, then press down all along its length.
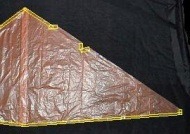
- Lay clear sticking tape along some of the edges, where indicated by the yellow rectangles. In a nutshell, tape every edge except the long edges of the tabs.
- With scissors, cut along all the black outline. This will leave most of the width of the sticking tape inside the sail outline. See the photo.
- Finally, wrap clear sticky tape around the double-thickness edges at the nose and tail ends of the sail.
As mentioned earlier, there's more kite making on this site than you can poke a stick at. :-)
Want to know the most convenient way of using it all?
The Big MBK E-book Bundle is a collection of downloads—printable PDF files which provide step-by-step instructions for many kites large and small.
That's every kite in every MBK series.
