- Home Page
- Better Kites
- ... Delta Kite
How to Make a Delta Kite
Step by Step—Page 3 of 4
The MBK Dowel Delta
How to Make a Delta Kite
Keel
Dacron line in 50-pound strength is ideal for these Dowel Series kites.
It's possible to make a delta kite without a keel, but this one flies very well as designed. Besides, if you make the keel from plastic in a contrasting color (black for example), it can really add to the kite's looks in the air.
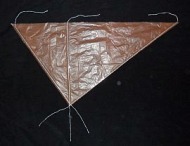
- Mark out the keel shape on some spare plastic as per the dimensions on the template.
- Cut out the keel, and tape down three lengths of flying line onto one side. Each line goes from the towing point to one of the three attachment points. Use sticky tape, not electrical tape. Allow the lines to extend about 0.12 DL (15 cm, 6 in.) past the plastic at each end as in the photo.
- Now flip the plastic over, and tape down another three lengths of flying line, directly over the first three.
- Reinforce the keel corners by sticking down and wrapping extra bits of tape where the pieces of line come out, making sure the plastic remains flat.
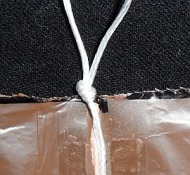
- Where two pieces of line come together, tie them both into a Multi-Strand Simple knot close to the plastic. These three knots will sit against the vertical spar. See the photo, which shows the middle attachment-point knot.
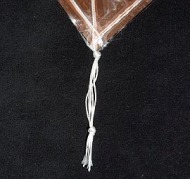
- The six pieces of line come together at the towing point. Tie the six strands into a Multi-Strand Simple knot close to the plastic, then tie another Multi-Strand Simple knot further out as in the photo. I've also trimmed the free ends to neaten it up.
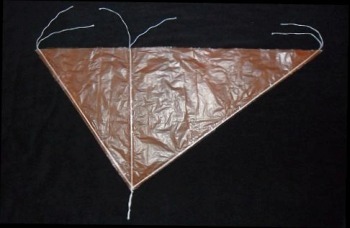
There's the completed keel. Now it needs to be attached:
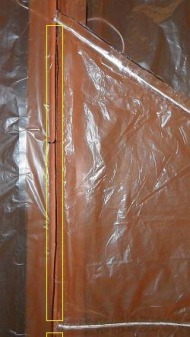
- Using a pen or pencil, poke a hole in the plastic sail exactly 0.36 DL (43.2 cm, 17 1/4 in.) from the nose of the kite. That's right over the vertical spar.
- Thread the middle keel lines through the hole, and tie off tightly. A Granny knot will do.
- Poke holes in the plastic for the upper and lower keel lines too, using the keel itself to find the exact spot along the vertical spar. Thread the lines through, and tie off tightly as you did for the middle hole.
- With the keel flat against the plastic sail, add sticky tape between the knots, attaching the keel to the sail plastic. See the photo, where I have added a yellow rectangle to show where the tape is.
- Flip the keel over, and do the other side.
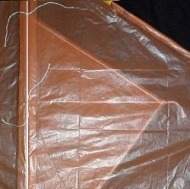
In the photo, the whole sail has been flipped over. The keel can be seen through the sail plastic, and also visible are the upper two knots tied off against the vertical spar.
At this point, you've pretty much finished making the Dowel Delta! However, there is a short setup procedure to go through before it will fly.
How to Make a Delta Kite
Attaching the Spreader
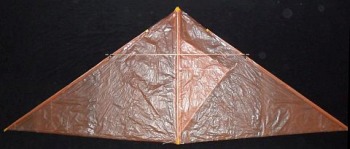
- Spread out the kite, with the keel touching the ground.
- Locate one tip of the spreader over its leading edge spar, wind each end of the shoelace around the spreader dowel, twice, then tie the shoelace firmly with a simple bow.
- Similarly, locate the other spreader tip and tie off.
Note: You might be tempted to wind the shoelace around both dowels. That is, where the leading edge and the spreader cross. Don't do this, as the knot will loosen much more easily in flight!
As mentioned earlier, there's more kite making on this site than you can poke a stick at. :-)
Want to know the most convenient way of using it all?
The Big MBK E-book Bundle is a collection of downloads—printable PDF files which provide step-by-step instructions for many kites large and small.
That's every kite in every MBK series.
