- Home Page
- Aerial Photos
- Noarlunga Centre
Noarlunga Centre
KAP Report
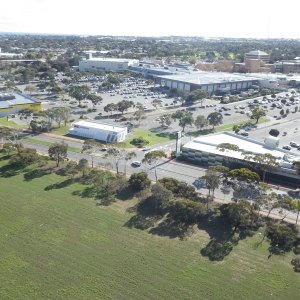
 Noarlunga Centre shopping complex
This was the third attempt to capture the expansive Noarlunga Centre (Aussie spelling) shopping complex via KAP (kite aerial photography).
Quite a few weeks ago, a small slip in setting up the tetrahedral KAP
rig resulted in a great record of what the sky and clouds looked like on
that day—but no buildings!
Yesterday, as I set up the gear in the late afternoon, the breeze just died completely. The big light-wind sled wouldn't inflate, let alone launch.
Today was a different story as will unfold now. And a new skewer KAP rig proved its worth.
On this site, there's more kite-making info than you can poke a stick at. :-) Want to know the most convenient way of using it all?
The Big MBK E-book Bundle is a collection of downloads—printable PDF files which provide step-by-step instructions for many kites large and small.
That's every kite in every MBK series.
Weather
The panoramic photo below is a skyscape and my view of the flying field. The target buildings are out of view, behind my back.
There was a good 20 percent coverage of thin mid-and-high-level cloud. However, the sky was more blue to the north, hence the sun might not have been obscured the whole time I was there.
A quick shoulder-height check with the wind meter during one of the two KAP flights showed about 10 kph gusting to 20 kph. That was near the middle of the field, but the breeze was clearly much stronger up at 350 feet—in the region of 30 kph gusts.
The logical choice of kite was the Fresh Wind Barn Door, after the much larger Multi-Dowel Barn Door kite started to struggle while near the top of its wind range.
Temperature? It was quite pleasant at about 20 degrees Celsius.
KAP Equipment
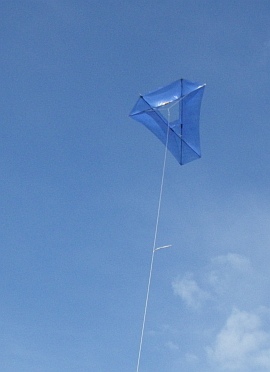
 MBK Fresh Wind Barn Door
Lifter: The Fresh Wind Barn Door kite. It lapped up the fairly smooth moderate breeze that just occasionally gusted into the fresh range. That is, the low 20s up to low 30s in kph.
In my ebook, Making Dowel Kites, there are a number of large kite designs suitable for KAP. That's low-cost DIY.
KAP Rig:
Bamboo-skewer cage with a wad of folded paper wedged in behind the
camera to incline the field of view down a little. I ran a full-Picavet
suspension, although it was not slippery enough to keep the horizon level. It did
an excellent job of maintaining direction and adjusting to line angle, though. The camera pointed generally upwind today. The direction was
tweaked 10 to 15 degrees either way on two separate flights to cover the
whole building complex. I should have flown the kite higher!
Camera:
Pentax Optio WG-2 with built-in intervalometer. EV was set to -1.0 to
reduce glare of shiny rooftops and ISO to 400 to help reduce motion
blur. Focus was fixed on infinity for the aerial shots.
Images
These images were selected to simulate panning from left to right. Just two direction settings were used on the rig on two separate flights.
Click on the thumbnail images below to see them much larger:
Flight Report
The usual two panoramic photos were taken with the aid of the solid little marked chair. The almost flawless stitched image appears near the top of this page. Flaws creep in when you don't take all three photos in exactly the same plane. The chair also came in handy later when I got the chance to just sit and observe for a while! The ground was damp.
Next, the line was laid and the Multi-Dowel Barn Door kite rigged, complete with twin drogues. However, before it even began to be launched, a corner tie pulled out. Better now than later! After a quick on-field repair, the huge barn-door was away.
Soon it was obvious that the big kite was pushing close to its limits. There was no point in risking the camera while that was going on.
Next up—the Fresh Wind Barn Door! This time, everything felt good. The spars
were the same diameter but with much less sail area plus a large
stabilizing hole in the middle, it was the right kite for the
conditions.
The new skewer KAP rig worked well, enabling me to twist the camera direction to capture the eastern part of the sprawling shopping complex.
At times the KAP rig and kite seemed to interact, resulting in large slow oscillations. The kite was nearly going sideways at these times. But most of the time, the movement damped out and the kite / rig combination stayed gratifyingly steady. I could just imagine the sharp images being taken.
About 15 minutes later, it was time to take the rig down for another photo sequence. With the exposed camera in this cradle, it was just a few second's work.
The kite flew anchored to one foot while I powered
the camera up again, paused a few seconds, then pressed the shutter
button to initiate another photo sequence. With the rig dangling close,
it was an easy matter to give the spindle a small twist to zero in on
the western portion of the target this time.
Again, the kite
performed well, proving that drogues probably wouldn't make much
difference under these conditions. The line was tight and the angle up
to the KAP rig hovered around 45 degrees most of the time. Perhaps it
touched 55 degrees when some weak rising air came through.
It was a bit of a trudge back to the car in the shopping center parking area, with chair, two rolled-up kites, and bag on one side and hose-reel winder plus skewer cradle on the other. Never mind. I knew that plenty of good images had been taken. Ah, the anticipation after a KAP session—the image processing at home is the icing on the cake!
The story or stories above document actual flying experiences. My write-ups are definitely "warts and all," since things don't always go totally as planned. However, half the fun of kiting is anticipating the perfect flight. When it happens, it's magic!
As mentioned earlier, there's more kite-making info here than you can poke a stick at. :-)
Want to know the most convenient way of using it all?
The Big MBK E-book Bundle is a collection of downloads—printable PDF files which provide step-by-step instructions for many kites large and small.
That's every kite in every MBK series.


