- Home Page
- Soft Kites
- ... Octopus Kite
How to Make an Octopus Kite
Step by Step—Page 2 of 5
The MBK Octopus
Making Middle Ribs
First, a template is measured up in two steps. For
this, use any smooth light-colored surface that you don't mind
marking with a pen or pencil. For example, use copier paper.
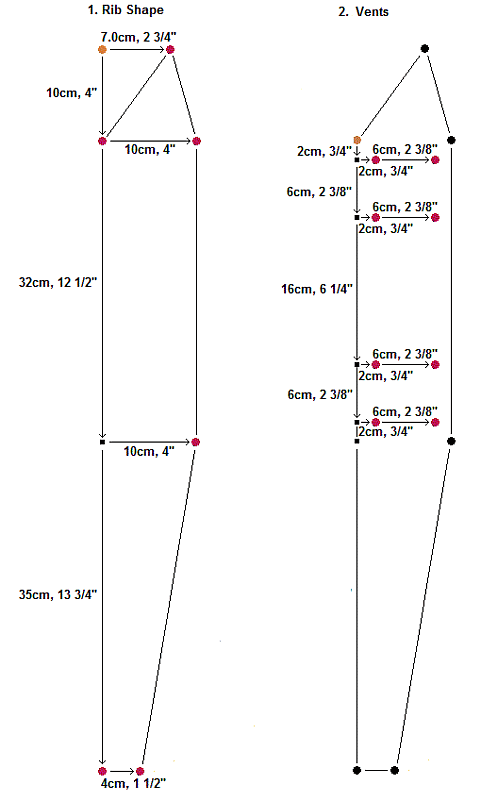 How to mark dots on middle rib template
- For each step, start from the orange dot, and then mark the red dots by following the measurements and arrows.
Marking Middle Rib Template
It's best to avoid using anything stretchy for
this, like very thin plastic! The photos below show my copier-paper
template. The sheets are joined by sticking tape on the other side.
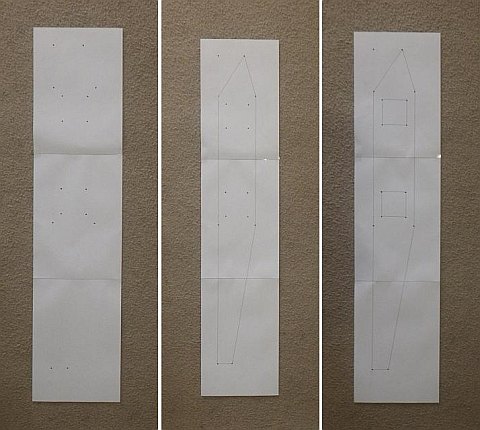 Middle rib template: dots, +outline, +vents
- The first photo shows the marked dots of the template.
- The second photo shows the rib outline drawn in. For accuracy, it's best to use a fairly thin-tipped marker for this. In fact, I used a ballpoint pen on the paper.
- The third photo shows the guide lines drawn in for taping and cutting the square vent holes.
Creating a Middle Rib
The first image below has the black dots enhanced so you can see them easier.
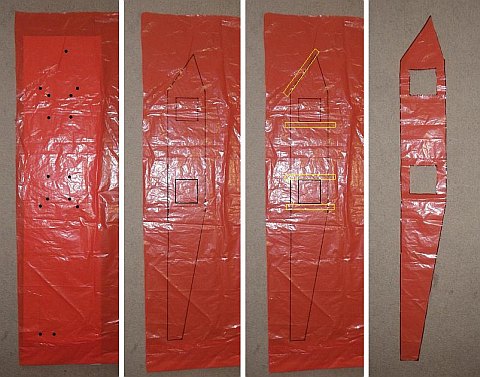 First middle rib—dots marked, lines drawn, taped, and cut
- Place some rib plastic over the template.
- Make dots at all the corners showing through as in the first photo.
- Draw lines between the dots exactly as shown in the second photo.
- Apply strips of sticking tape where indicated by the yellow rectangles in the third photo.
- Cut around the rib shape with scissors as in the fourth photo. Also, cut out the two square vents along the black lines.
Completing Middle Ribs
You have just made one middle rib. Now make two
more in exactly the same way.
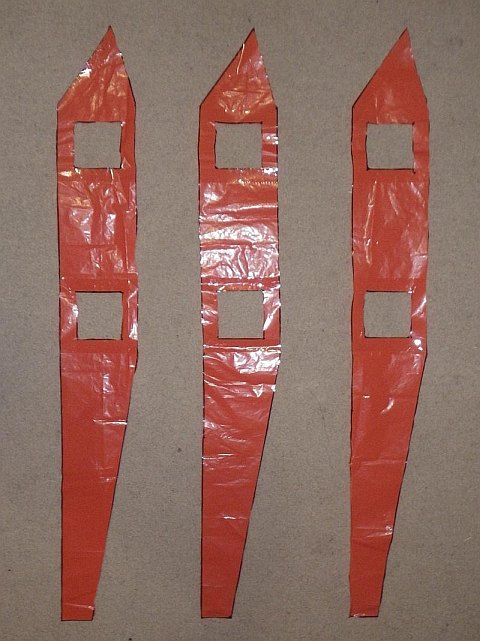 All three middle ribs
Creating A-Lines Attachment Points
This kite uses loops of 20-pound flying line as attachment points for all the bridle lines. This includes the A-lines, which are the three attached to the lower rim of the air intake.
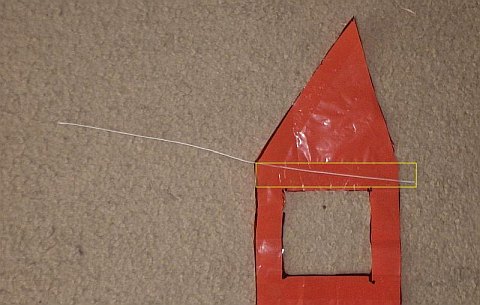 Starting to make a bridle line attachment point
- Get some 20-pound line, your scissors, sticking tape, and one middle rib.
- Cut a piece of the line to a length of 25 cm (9 3/4 in.), and stick it down as indicated by the yellow rectangle in the photo. 1 cm (3/8 in.) of tape and line should overhang the plastic on the right. Note how the line goes across the corner of the rib edge on the left.
Here are the
remaining steps for making a bridle attachment point on a middle
rib:
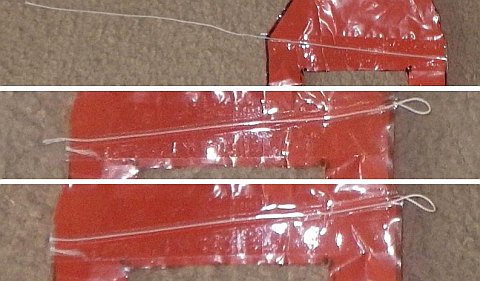 Completing a bridle attachment point
- Top Photo—Fold the sticking tape around to the other side of the plastic, sticking the overhanging bit of line with it.
- Middle Photo—Flip the rib over, and stick down the remaining line, leaving the same amount overhanging. Notice that a little loop of line has been left off one edge of the rib. A bridle line will attach here later.
- Bottom Photo—On the left, fold around and stick the overhanging tape and line to the other side of the plastic.
You have now completed a bridle attachment point
on a middle rib. Now do the other two middle ribs in exactly the same
way.
 The three middle ribs with bridle attachment points added
Making Side Ribs
As was done for the middle ribs, a template is
measured up in two steps.
Measuring Rib Template Dots
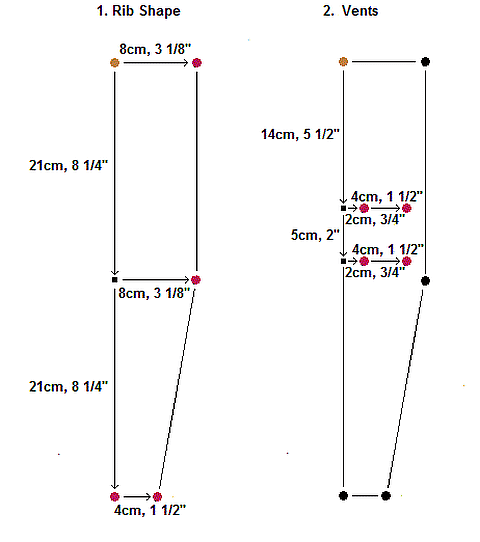 How to mark dots on side-rib template
- For each step, start from the orange dot, and then mark the red dots by following the measurements and arrows.
Marking Side Rib Template
The photos below show my side-rib template, made
with just two sheets of copier paper.
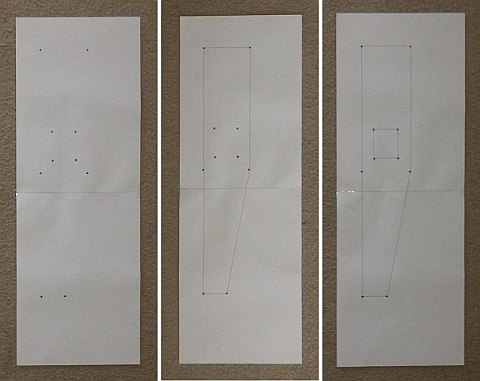 Side rib template: dots, +outline, +vent
- The first photo shows the marked dots of the template.
- The second photo shows the rib outline drawn in.
- The third photo shows the guide lines drawn in for taping and cutting the rectangular vent hole.
Creating a Side Rib
The side ribs are done similarly to the middle
ribs.
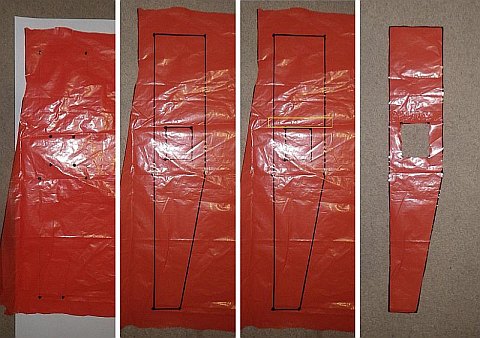 First side rib—dots marked, lines drawn, taped, and cut
- Place some rib plastic over the template. This can be a little heavier than any other plastic you are using for this kite. It should at least not be any lighter than the upper surface plastic.
- Make dots at all the corners showing through as in the first photo.
- Draw lines between the dots exactly as shown in the second photo.
- Apply a strip of sticking tape where indicated by the yellow rectangle in the third photo.
- Cut around the rib shape with scissors as in the fourth photo. Also, cut out the rectangular vent along the black lines.
Completing Side Ribs
You have just made one side rib. Now make one
more in exactly the same way.
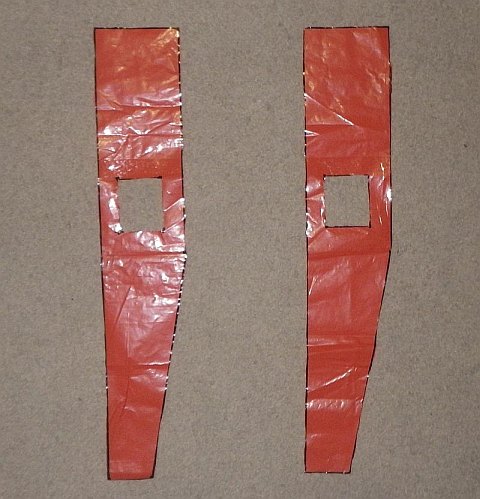 Both side ribs
Creating More Attachment Points
The procedure for making an attachment point using 20-pound line and sticking tape has already been described. The photos show the line being stuck to the upper end of a side rib. Notice how it goes straight across now instead of at a slight angle.
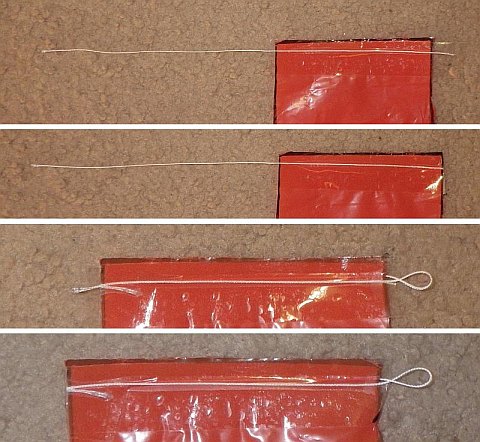 Creating a bridle-line attachment point on a side rib
- Top photo—Cut a piece of 20-pound line to a length of 21 cm (8 1/4 in.) this time. Stick it down as shown, with 1 cm (3/8 in.) overhanging the plastic on the right as in the photo. The longest edge of the rib is on the left.
- You've done this process before, so just follow the remaining photos up there in order.
Attachment point complete? Now move down to the lower edge of the vent hole, and do the same again.
And do both attachment points on the second
side rib also:
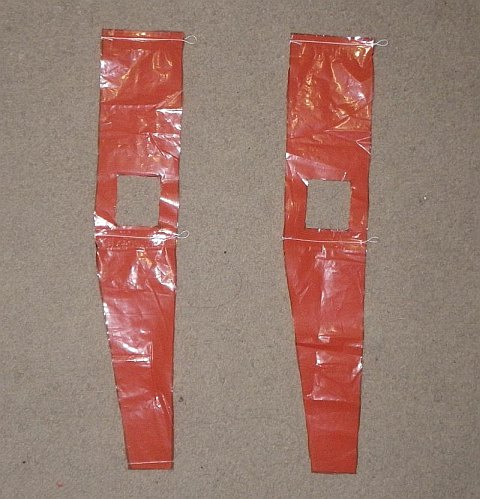 Both side ribs with all four attachment points added
As mentioned earlier, there's more kite making on this site than you can poke a stick at. :-)
Want to know the most convenient way of using it all?
The Big MBK E-book Bundle is a collection of downloads—printable PDF files which provide step-by-step instructions for many kites large and small.
That's every kite in every MBK series.
