- Home Page
- Soft Kites
- ... Sled Kite
How to Make a Soft Sled Kite
Step by Step—Page 2 of 2
The MBK Soft Sled
Taping the Cells
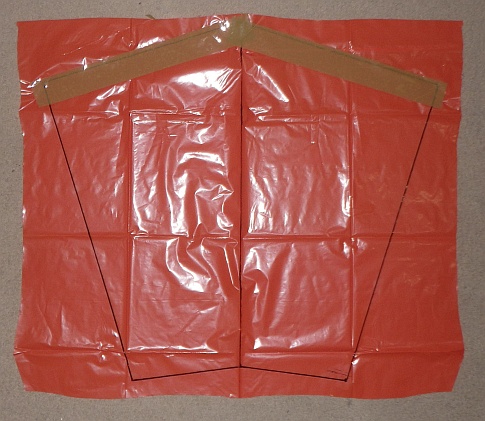 Marked side taped
- Lay packing tape along just the top edges of the cell plastic as in the photo above. Let the tape overlap the black line by about a finger width above the line.
Cutting the Cells
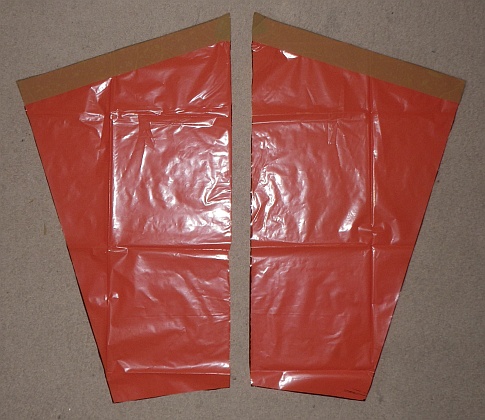 Cells cut
- Take your scissors, and cut along every black line, including the one down the middle.
- When you are finished, you will have the two cells as in the photo—ready to attach to the main sail.
Attaching the Cells
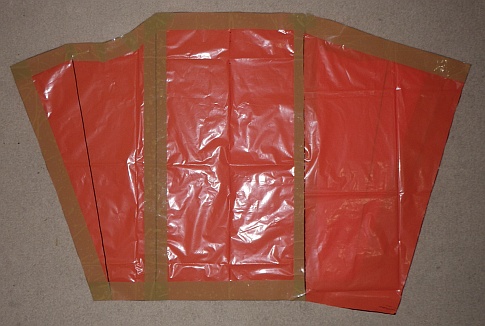 Cell inner seam tacked on
- Take one piece of cell plastic, and lay it over the sail, lining it up so it looks exactly like the photo up there. Or get it as close as possible, given that you are probably using slightly different plastic and tape.
- Tack the cell plastic in place with several small bits of sticking tape. Align with the black line showing through the packing tape. The sticking tape ensures the plastic doesn't move while you are doing the next step.
Like to see a video clip? Just scroll down to near the end of this page.
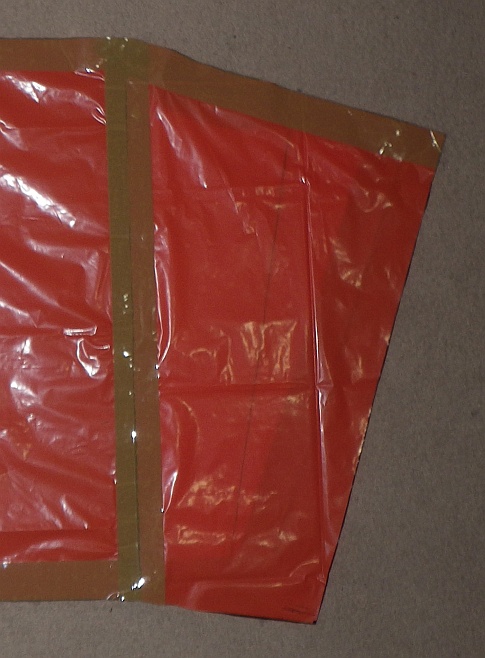 Cell inner seam taped
- Run packing tape the entire length of the join, keeping it centered over the black line. Go straight over those little bits of sticking tape!
- Trim the ends of the packing tape with scissors so it lines up with the edges of the sail and cell plastic. See the photo above.
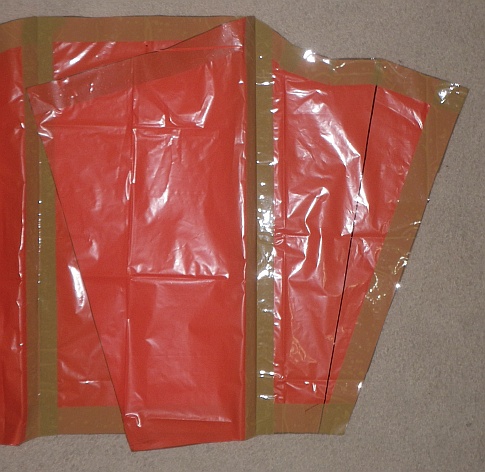 Cell flipped and taped again
- Flip the cell plastic up, and fold it flat against the sail plastic, away from where it was before. Crease the join with your thumbnail so it stays down better.
- Now run packing tape the entire length of the cell, keeping it centered over the line as before. Cut off and trim at each end so it looks like the photo up there.
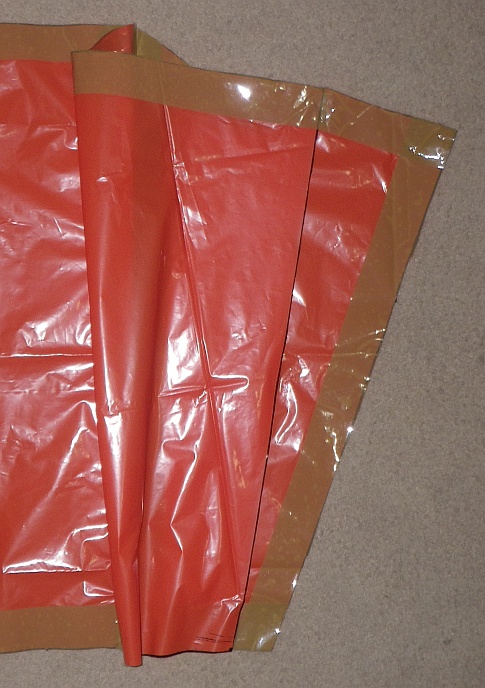 Cell outer seam tacked on
- Line up the other long edge of the cell with the other black line, again tacking it in place with small bits of sticking tape.
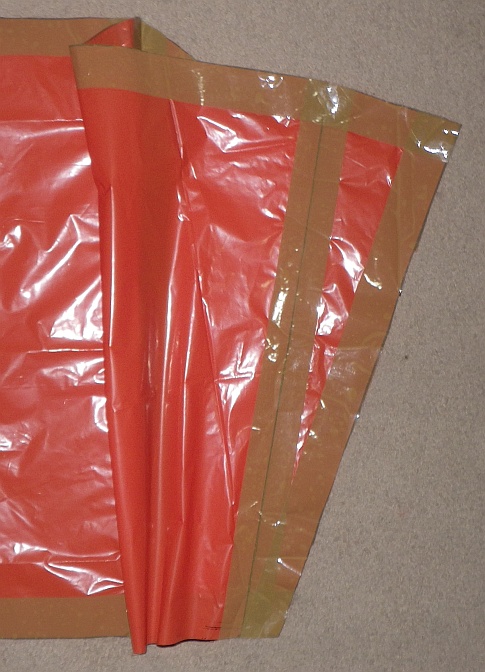 Cell outer seam taped.
- Run packing tape the entire length of the cell edge, and neaten it up at each end with scissors. As you can see in the photo, it looks like an inflatable cell now!
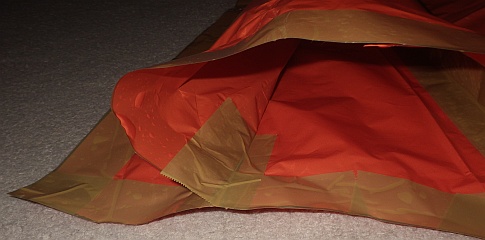 Reinforced cell opening
Now you will reinforce the inside of cell's larger opening.
This is hard to explain in words, so look very carefully at the closeup photo above. Your task is to pull off about a hand width of packing tape, and stick it down along the inside of the edge you taped in the previous step. Trim with scissors if necessary.
The photo's too good, isn't it; it shows every bubble, crease, and inaccuracy! See if you can do better.
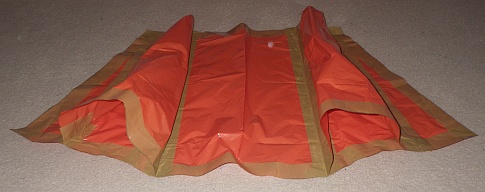 Cells done
- Yep, you guessed right—repeat all the above steps with the other piece of cell plastic. One cell is a mirror image of the other as in the photo. It's starting to look like a kite!
How to Make a Soft Sled Kite
The Bridle
Towing Points
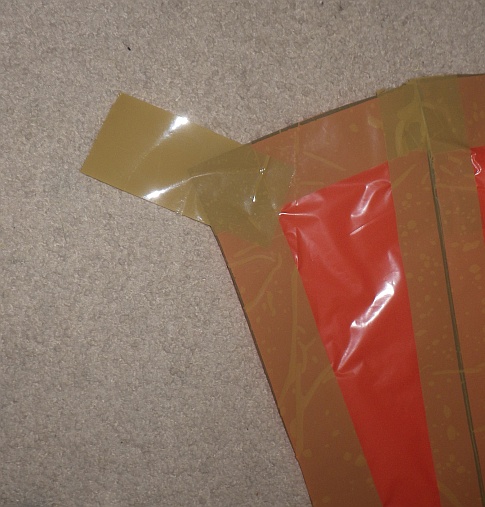 Towing point tape—first
- Place a 10 cm (8 in.) length of packing tape over one towing-point corner of the sail as shown in the photo. That's halfway between each edge of the sail corner. Also, it's half on and half off—but try not to let the off bit stick to the floor or tabletop!
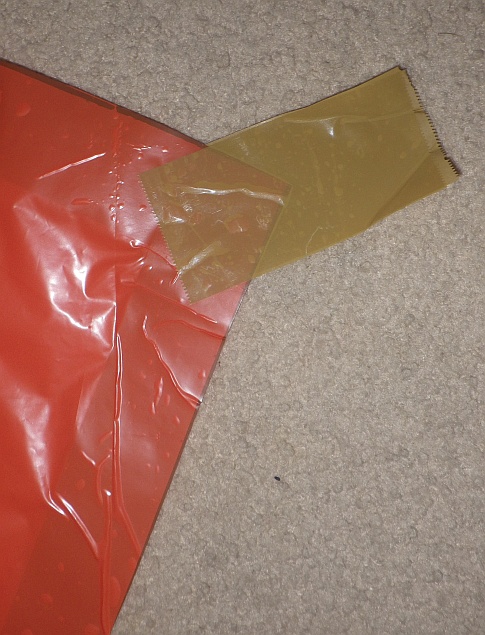 Towing point tape—second, stuck to first
- Flip the sail over, and do your best to stick another similar piece of tape right over the first one. Press them together where they leave the plastic. See the closeup photo.
- You know what's coming. Go to the corresponding corner on the other side of the kite, and do exactly the same thing, using two more strips of tape. There's the result below. All that remains is to attach the bridle!
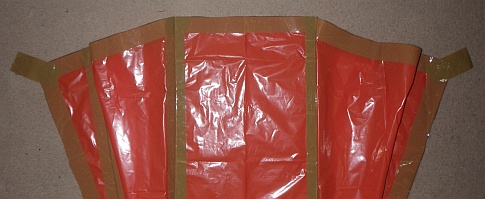 Top half of kite, cells pushed flat
Attach the Bridle
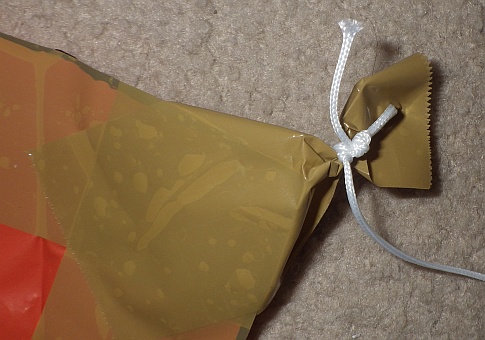 Towing-point tape crushed and tied
- Cut off a 3 meter (10 foot) length of flying line.
- Tie
one end of the line to one towing-point tape of the kite as in
the photo. Use any knot you know, but make it as tight as possible to
crush the tape*. It helps to fold the tape in half before winding the line around it.
- Similarly, tie the other end of the line to the other towing point. There they both are, in the photo below. The photo shows the side of the kite that faces the flier during flight.
( * A very reliable method I prefer is to secure the bridle line to the tape with a Double Wrap Slip knot.)
 Both towing points tied
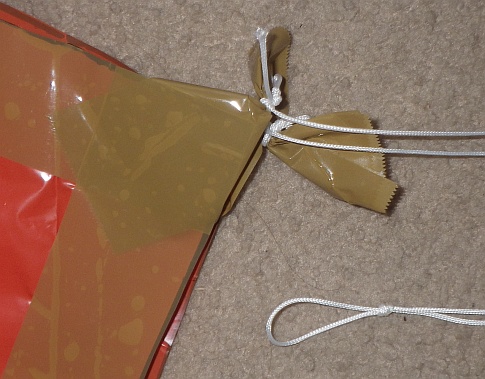 Bridle complete
- It's nearly finished! Lay the kite on the floor, folded in half so the towing points are perfectly lined up with each other. See the photo.
- Stretch out the bridle lines, and tie a Simple Loop knot in, right near the end. The two bridle lines should be exactly the same length. I've brought the loop knot back into the photo, above, so you can see it.
After Kite Completed
Fold and Roll Up
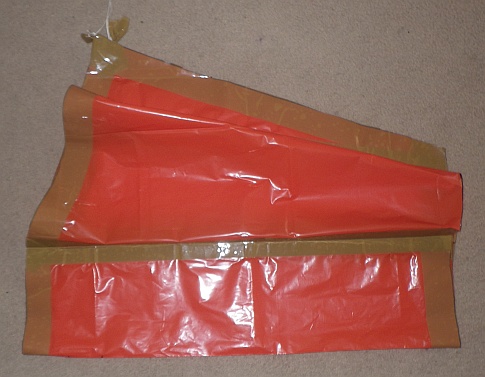 Fold in half along the centerline
 Roll up, and wind bridle around
The kite is all ready to take or stow somewhere!
Flying!
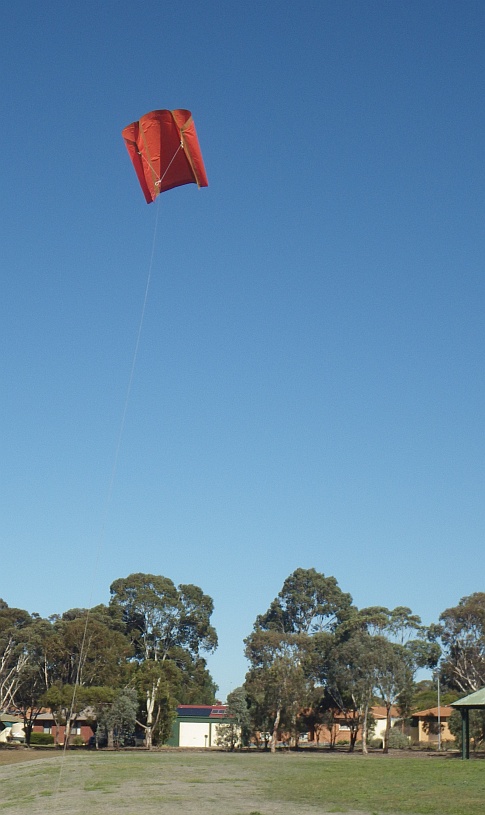 Nothing to it—attach line, catch breeze
After unrolling the kite at a flying field, your flying line can be tied to the bridle loop. That's it; you're ready to fly.
Alternatively, you can Lark's Head the flying line behind the loop knot. This makes it easier to attach the flying line and take it off again.
Remember that the inflatable cells need to be on the outside of the kite when flying. You can see them in that photo up there.
Avoid flying in very windy weather.
Tails are optional with this design. If you want to, tie a simple streamer through a hole near each lower corner of the sail. The packing-tape border will prevent any further damage to the kite.
It doesn't take much breeze to keep the MBK Soft Sled design aloft. In some ways, it's actually more fun to fly single-line kites in light wind. By watching, you can learn a lot about what's happening up there.
In the video below, taken at a beach, a bit of tail has been added to one side just to help keep the kite straight. With a shiftable knot in the bridle, shifting the knot by a few millimeters in the right direction would have the same effect.
As mentioned earlier, there's more kite making on this site than you can poke a stick at. :-)
Want to know the most convenient way of using it all?
The Big MBK E-book Bundle is a collection of downloads—printable PDF files which provide step-by-step instructions for many kites large and small.
That's every kite in every MBK series.
