- Home Page
- Soft Kites
- ... Parasail Kite
How to Make a Parasail Kite
Step-by-Step—Page 2 of 2
The MBK Parasail
Taping, Cutting the Central Vents
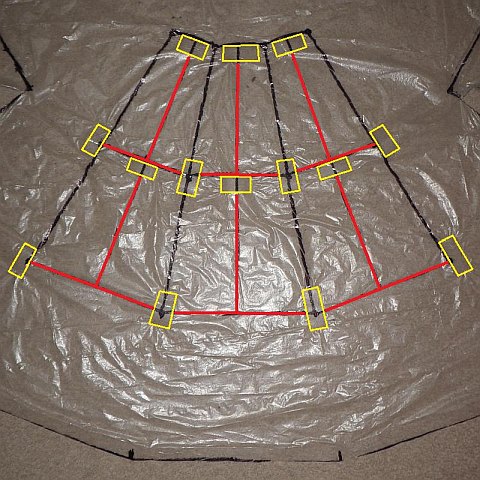 Central vents taped
- Check that all six of the side vents have been done.
- Lay lengths of sticky tape around the the six central vents, as shown in the photo. As before, tape outlines are marked in yellow to make them easier to see.
- Snip along the red lines with scissors to prepare the vents for being opened out.
Opening the Central Vents
These are
done just like the side vents, except that some of the measurements
are a little different:
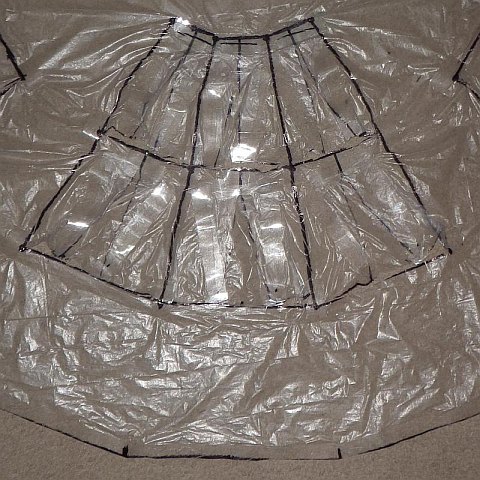 Central vents opened
- Do the top row of three first, spreading the slits to 5 cm (2 in.), like the side vents. Cover with plastic rectangles cut to 5 cm x 12 cm (2 in. x 4 3/4 in.). Then do the bottom row of three, spreading the slits to 7 cm (2 3/4 in.). Cover with plastic rectangles cut to 7 cm x 12 cm (2 3/4 in. x 4 3/4 in.).
Measuring the Central Hole
The central hole is a feature of the full-size
parachute and provides a little extra stability. On the kite, the
triangular shape is a bit of a visual feature too!
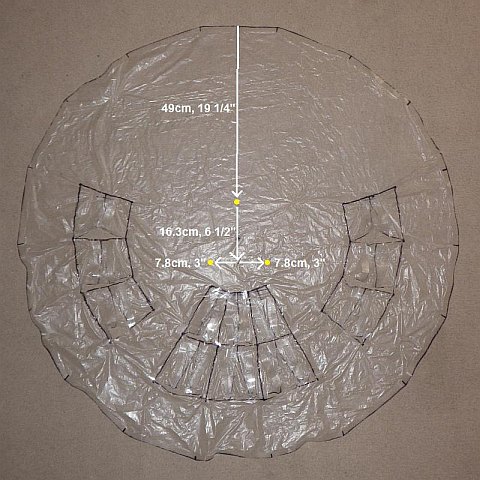 Measure and mark dots
- Measure and mark three dots on the plastic by following the arrows marked on the photo above. (Accuracy is less important here, so we are not bothering with folding, tracing, and so on.)
Marking, Cutting, Taping the Central Hole
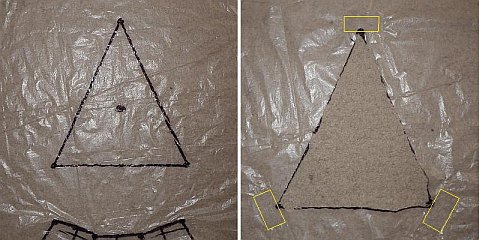 Marked, cut, and taped
- Use your ruler to connect the dots as in the photo on the left.
- Cut all around the triangle with scissors.
- Reinforce the corners by placing small strips of sticking tape as shown in yellow in the photo on the right.
How to Make a Parasail Kite
The Bridle and Patch
Bridle Attachment Points
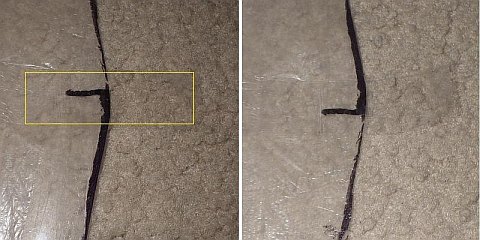 Placing attachment point tapes
- Place a 5 cm (2 in.) length of sticky tape over one corner of the sail as can be seen in the photo on the left and with the help of a yellow rectangle! Also, place it half on and half off—but try not to let the off bit stick to the floor or tabletop.
- Flip the sail over, and stick another similar piece of tape right over the first one. Press them together where they leave the plastic. The photo on the right shows the tapes at this point. Don't worry if it curves up a bit as it does in the photo.
- You know what's coming. Work your way around the outside edge of the sail, adding two bits of tape to every corner. Each pair will point straight at the center of the sail.
Tying an Attachment Point
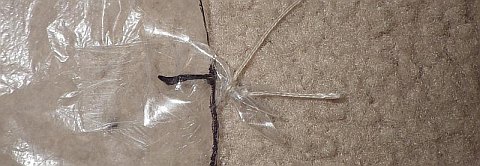 Attachment point tape crushed and tied
- Cut off a piece of the flying line, 2.5 m (8 ft.) long.
- Tie one end of the line to a pair of towing-point tapes as in the photo. Use any knot you know, but make it tight to crush the tape. A reliable method I prefer is to use a Double Wrap Slip knot. It helps to fold the tape in half before winding the line around and tightening the knot.
Finishing the Attachment Points
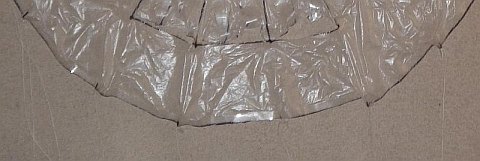 More attachment points tied
- You've done one piece of line already. Now cut off 17 more pieces to the same length.
- Tie the lines on all around the sail at the remaining attachment points. It'll take a while, but think how cool it will look in flight.
Adjust Bridle Lines
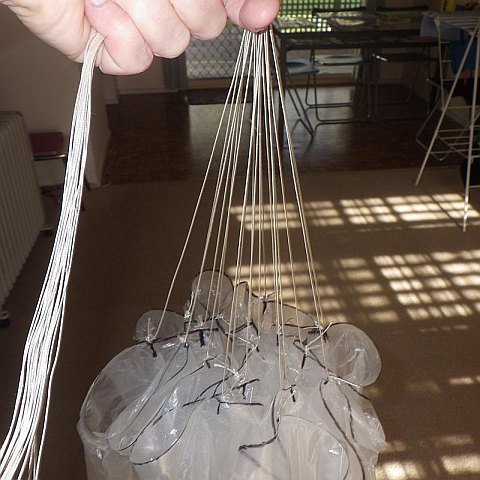 Bridle lines tied to length
- Make a mark on one of the bridle lines, 1.5 m (5 ft.) away from its attachment point.
- Grasp all the bridle lines, letting the sail hang down as in the photo.
- Holding the lines loosely, carefully pull various towing points down until they all seem to be at about the same level.
- Move along to the 1.5 m (5 ft.) mark, being careful not to lose the alignment you made in the previous step, and knot the entire bundle. Just a Multi-Strand Simple knot will do. See the photo below.
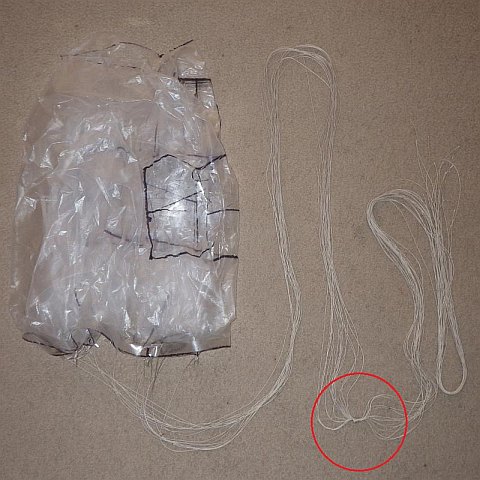 Lines knotted
Like to see a video clip? Just scroll down to near the end of this page.
Create "Passenger"
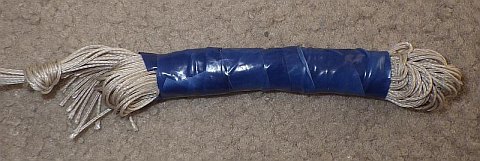 Completed "passenger"
- Fold the free lines below the knot into a compact bundle. I just stretched them out all together and then folded in half several times.
- Secure the bundle with a generous amount of tape. Stretchy electrical tape is ideal. The weight will help the kite to perform as a parachute when the wind drops.
Adding the Weight Patch
 Heavy plastic patch stuck on and weighted some more
- Spread the central vents portion of the completed sail flat, with marks and tape facing up.
- Cut a piece of fairly heavy plastic to a rectangular shape so it fits just above the two lowest bridle lines. The lowest central vent opening is visible just above the patch in the photo.
- Stick all sides of the patch to the sail.
- Add a few strips of heavy tape, such as electrical tape, to the patch for added weight.
After Kite Completed
Pack and Roll Up
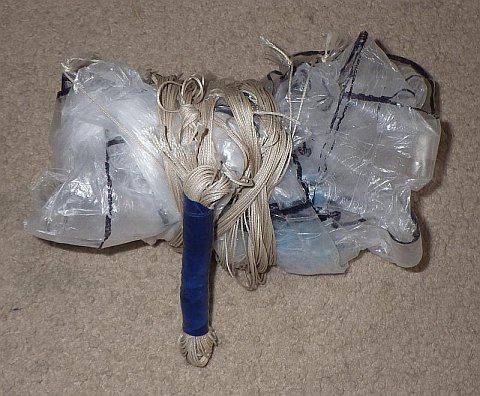 All rolled up and ready to stow
- If you've just been flying, remove the flying line.
- Starting from the big knot in the bridle lines, enclose them in finger and thumb and slide right down to the sail.
- With all the bridle lines together, squash the sail into a narrow cylinder and then roll or fold it up into a shorter package.
- Wind the bridle lines around the sail as in the photo above—all ready to stow or take somewhere!
Flying!
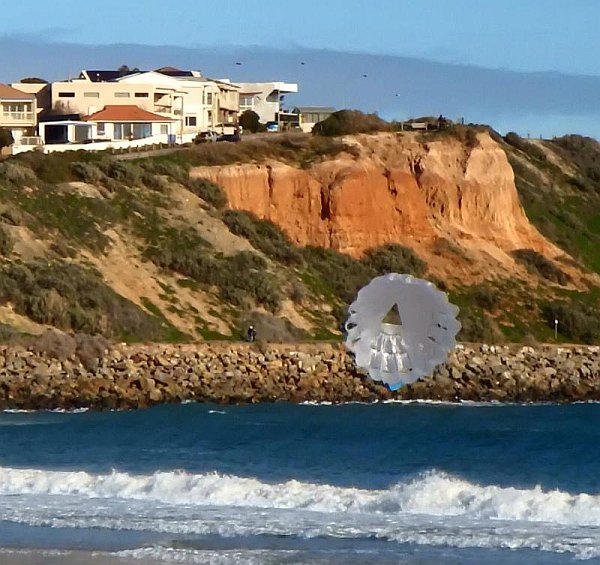 Nothing to it—attach line, catch breeze
After unrolling the kite at a flying field, your flying line can be tied behind the big bridle knot. That's it; you're ready to fly.
Alternatively, you can Lark's Head the flying line behind the knot. This makes it easier to attach the flying line and take it off again.
Avoid flying in very windy weather. Add more weight, bit by bit, to the weight patch if the kite wanders a long way to the left and right. The photo shows an earlier approach of mine, where the patch was between two bridle lines rather than on the sail itself.
Tails are optional. If you want to, tie simple rectangular streamers from the lowest four bridle attachment points. That is, near the bottom of the sail as seen in flight.
I hope you enjoyed learning how to make my MBK Parasail design!
As mentioned earlier, there's more kite making on this site than you can poke a stick at. :-)
Want to know the most convenient way of using it all?
The Big MBK E-book Bundle is a collection of downloads—printable PDF files which provide step-by-step instructions for many kites large and small.
That's every kite in every MBK series.
