- Home Page
- Paper Kites
- ... Diamond Kite
How to Make a Paper Diamond Kite
Step by Step—Page 1 of 3
The MBK Paper Diamond
Learn how to make a paper diamond kite with these easy-to-follow instructions. It's fully illustrated with closeup photographs every step of the way.
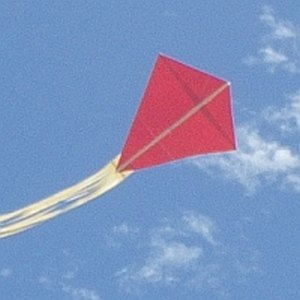 MBK Paper Diamond
These instructions take you step by step through making a small but high-flying diamond kite—all from several pieces of A4 or Letter size copier paper and some sticking tape!
Talking about "high flying"—it's a good idea to get the kite as high as you can when flying inland.
That way, when the wind drops out for half a minute or so, the kite is
still in the air and so can climb back up again all on its own.
This kite performs well in gentle to moderate wind speeds. That's from 12 to 28 kph or from 8 to 18 mph. Even quite a small child should be able to hang on to the winder once the kite is up.
On this site, there's more kite-making info than you can poke a stick at. :-)
Want to know the most convenient way of using it all?
The Big MBK E-book Bundle is a collection of downloads—printable PDF files which provide step-by-step instructions for many kites large and small.
That's every kite in every MBK series.
How to Make a Paper Diamond Kite
The Sail
Tack Paper Sheets Together
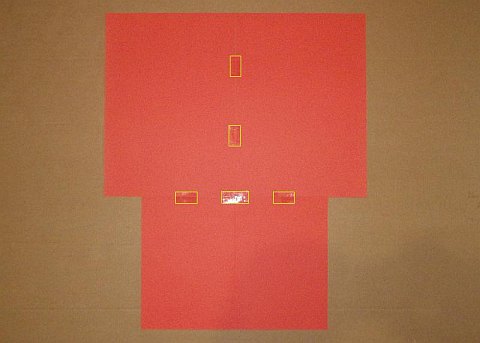 Three sheets of paper tacked together
- Orient the top two sheets so each one is taller than it is wide. Orient the bottom sheet the other way. Also, put a crease up the middle of the bottom sheet so you can center it easily against the other two sheets. The paper color(s) are up to you!
- Bring the sheets of paper together, and tack in place with short strips of sticking tape. Yellow lines show where the tape goes.
Measure on One Side
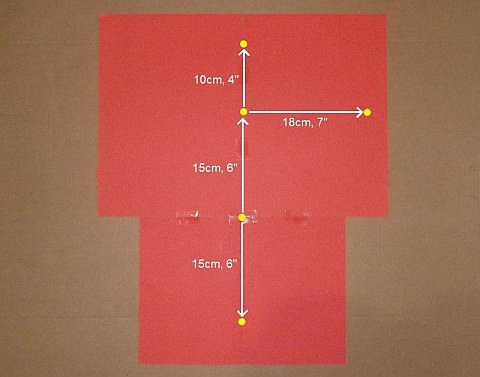 Sail corners measured and marked
- Start measuring from the point where all three sheets of paper meet—the second dot from the bottom in the photo.
- Using a pencil, make dark dots on the paper, following the arrows shown above. I have added yellow dots to make the positions clear.
- Note how dots are placed either on the centerline from top to bottom or to the right of the centerline.
Fold Along the Centerline
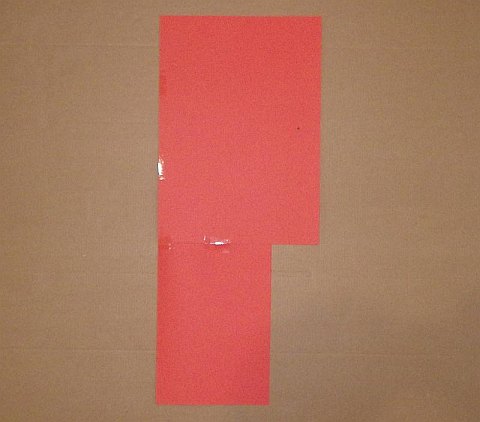 Paper sheets folded
- Fold the three sheets along the centerline, leaving the dots on the outside. A small dot on the red paper is just visible in the photo near the top right-hand edge.
- Place the paper up against a window while there is some light outside.
- Trace the dot that is near the edge onto the unmarked side.
Note: What if the paper is too dark to see through? Just poke a hole through the dot with a needle so you can see where to put a dot on the unmarked side!
Draw Sail Shape
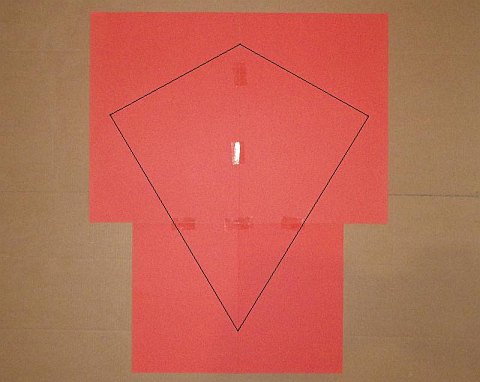 Lines drawn between dots
- Unfold the paper and lay it down.
- Using a pencil and ruler, connect the dots as shown in the photo.
Note: The lines in the photo are enhanced so you can see them easier.
Apply Tape
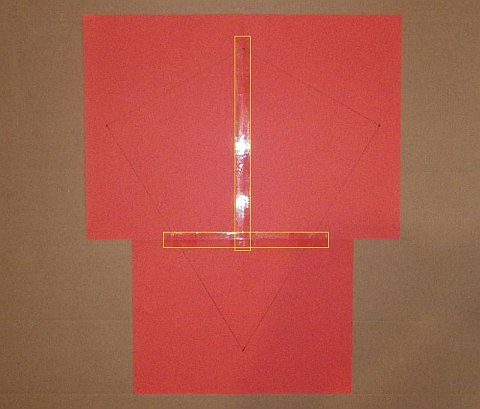 Tape laid down
- Apply sticking tape as indicated by the yellow rectangles in the photo. The ruled lines haven't been enhanced in this photo!
Cut Sail Shape
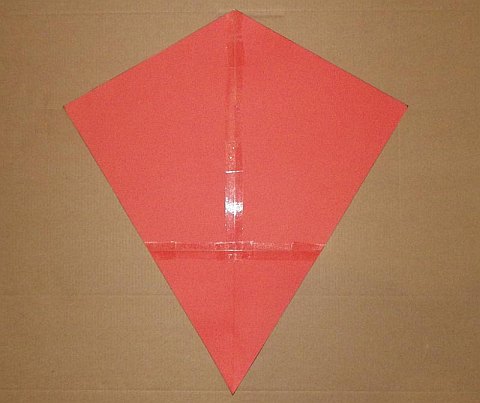 Sail cut out
- With scissors, cut all around the sail shape. There it is in the photo.
Draw Vertical Guide Lines
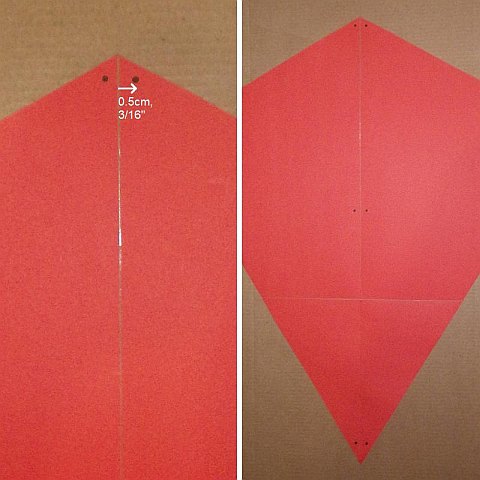 Dots drawn for vertical guide lines
- Lay down the sail so the sticking tape is against the floor.
- Near the top of the sail, make a dot on each side of the centerline, 0.5 cm (3/16 in.) from the line. See the photo on the left up there.
- Similarly, make a pair of dots near the middle of the centerline and also near the bottom end of the centerline. The photo on the right shows all three pairs of dots.
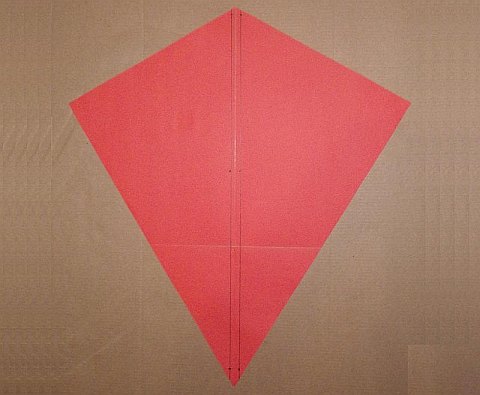 Both guide lines drawn
- Rule two straight lines through all the dots as shown. The dots in the middle are handy if you only have a standard 30 cm (12 in.) ruler.
Note: The camera flash has made the lines faint in the middle of the photo above.
Draw Horizontal Guide Lines
 Lines drawn out to tips
- Flip the sail over and, if it isn't there already, mark a dot on the centerline 10 cm (4 in.) from the nose end.
- Using your ruler, draw a line from the dot out to each side tip of the sail shape.
Note: If you have a longer ruler, just draw a line all the way from one tip to the other!
 Left side—dots marked above and below the line
- Mark dots, 3 mm (1/8 in.) away from the line near the paper corner and 9 mm (3/8 in.) away from the line near the sticking tape. Refer to the photo, where the dots have been highlighted in yellow on the left-hand side of the paper.
- Do the same on the right-hand side of the paper.
Note: Only the distance away from the line needs to be accurate; the distances from the middle and from the corners can be done by eye from the photo.
 Spar guide-lines drawn through all the dots
- Using your ruler, draw lines through all the dots as shown in the photo.
The Vertical Spar
Measure Rectangles
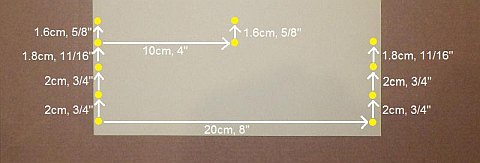 Measured and dots marked
- Measure and mark dots where indicated by the yellow dots in the photo.
Note: The distances to the edges of the paper don't matter. Just measure as indicated.
Draw Lines
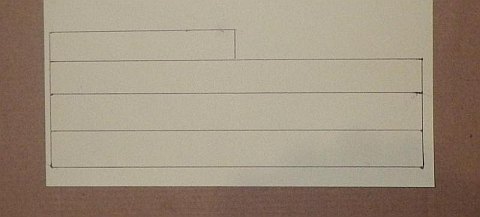 Lines drawn between dots
- Using your ruler, connect the dots as shown.
Tape Over
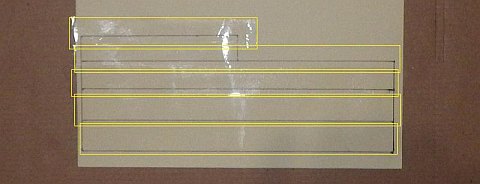 Rectangles taped
- Lay strips of sticking tape over the rectangles as illustrated in the photo.
- The strips of tape can overlap slightly and should cover the rectangles completely.
Cut Out
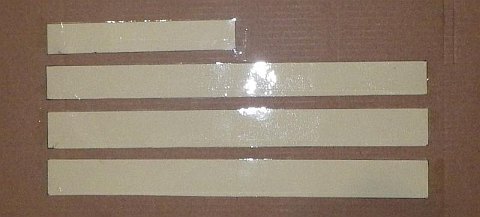 Rectangles cut out
- Cut out the rectangles, which will be totally covered in tape on one side. Some curl is OK—in fact I used tape to get the rectangles sitting flat for the photo above.
Stick Together
 Widest rectangles with taped sides touching, before folding tape around end
- Lay down the two widest rectangles on top of each other with the taped sides touching.
- Stick the rectangles together at one end by wrapping a short piece of tape around as in the photo. This ensures that the rectangles will be perfectly straight when opened out.
 How to tape rectangles after opened out
- Open out the rectangles with the taped sides facing down.
- Place a piece of sticking tape across the join as in the photo. The tape should be about as long as two widths of the paper.
- Fold the overhanging bits of tape around, and stick firmly.
 Next rectangle positioned and taped down
- You have a short and a long rectangle remaining. Position the longer rectangle, taped side down, so one end is 5 cm (2 in.) in from the end of the joined rectangles.
- Tack both ends of the overlying rectangle down with squares of sticking tape. See the yellow squares in the photo.
 Smallest rectangle positioned and taped down
- It's the same process again with the remaining rectangle. Position the taped side down before tacking in place with squares of tape as shown. This time the distance from the end should be 7.5 cm (3 in.). See the photo.
Encase in Tape
 Tape laid down over one long edge
- Lay a strip of sticking tape the full length of the paper, leaving half the width overhanging.
 Tape folded around a long edge
- Fold the overhanging tape around so it sticks to the other side. Doing it all at once with one strip of tape can be tricky, so consider using two or three strips of tape instead. A little bit of overlap is OK.
 Tape laid and folded around other long edge
- In the same way, cover the other half of the paper with tape, and fold around. The three layers of paper should now be almost completely covered in sticking tape on both sides from end to end.
- Trim off any excess folded tape at either end with scissors.
As mentioned earlier, there's more kite making on this site than you can poke a stick at. :-)
Want to know the most convenient way of using it all?
The Big MBK E-book Bundle is a collection of downloads—printable PDF files which provide step-by-step instructions for many kites large and small.
That's every kite in every MBK series.
