- Home Page
- Paper Kites
- ... Delta Kite
How to Make a Paper Delta Kite
Step by Step—Page 1 of 3
The MBK Paper Delta
Learn how to make a paper delta kite with these easy-to-follow instructions. It's fully illustrated with closeup photographs every step of the way.
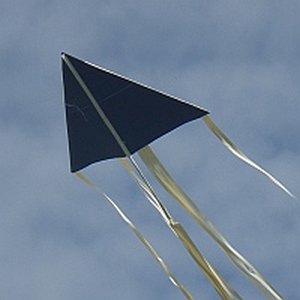 MBK Paper Delta
These instructions take you step by step through making a small but high-flying delta kite—all from several pieces of A4- or Letter-size copier paper and some sticking tape!
This kite performs well in gentle to moderate wind speeds. That's from 12 to 28 kph or from 8 to 18 mph. Even quite a small child should be able to hang on to the winder once the kite is up.
Making marks on black paper with a pen can be tricky since the marks are hard to see. But soft lead pencil comes up with a bit of shine, which makes the marks easier to see. A black kite shows up well in the air, no matter what's happening in the sky. Well, OK—if large parts of the sky itself are jet black, then perhaps you shouldn't even be flying. ;-)
On this site, there's more kite-making info than you can poke a stick at. :-)
Want to know the most convenient way of using it all?
The Big MBK E-book Bundle is a collection of downloads—printable PDF files which provide step-by-step instructions for many kites large and small.
That's every kite in every MBK series.
How to Make a Paper Delta Kite
The Sail
Tack Paper Sheets Together
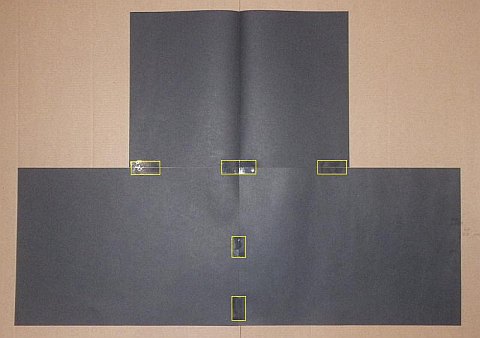 Three sheets of paper tacked together
- Orient the sheets sideways as shown in the photo. The paper color(s) are up to you!
- Crease the upper sheet down the middle by folding from left to right. Bring the sheets together, and tack in place with short strips of sticking tape. Line up the crease with the join line of the other two sheets. Yellow lines show where the tape goes.
Note: The edges of tape just applied are shown as yellow lines from here on.
Measure on One Side
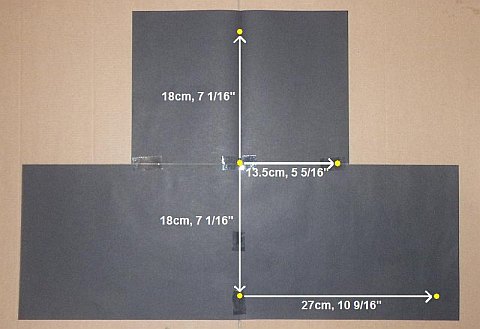 Sail shape measured and marked
- Start measuring from the point where the three sheets of paper meet.
- Using a pen (perhaps a felt-tip on the sticking tape!), make dots on the paper, following the arrows shown above. I have added yellow dots to make the positions clear.
- Note how dots are placed either on the centerline from top to bottom or to the right of the centerline.
Note: The second dot from the right is handy if you only have a standard 30 cm (12 in.) ruler. If you have a longer ruler, that dot may be left out.
Fold Along the Centerline
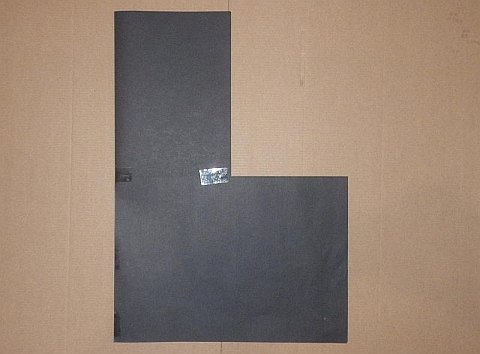 Paper sheets folded
- Fold the three sheets along the centerline, leaving the dots on the outside.
- Place the paper up against a window while there is some light outside.
- Trace the dots that are away from the centerline onto the unmarked side.
Note: What if the paper is too dark to see through like the black used here? Just poke a hole through the dot with a needle so you can see where to put a dot on the unmarked side!
Draw Sail Shape
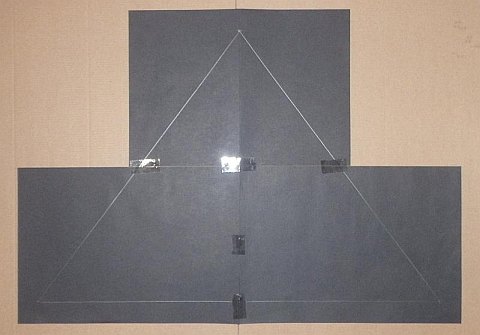 Lines drawn between dots
- Unfold all the paper, and lay it down.
- Using a pen and ruler, connect the dots as shown in the photo.
Note: For black paper, I found a blunt soft pencil leaves a shiny line on the matte surface of the paper. Otherwise, the lines can be very hard to see!
Apply Tape
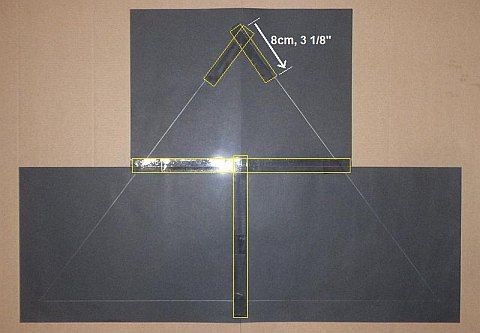 Tape laid down
-
Apply
sticking tape as indicated in the photo. Those two strips at
the top
extend 8 cm (3 1/8 in.) along the sail outline from the nose point.
Cut Sail Shape
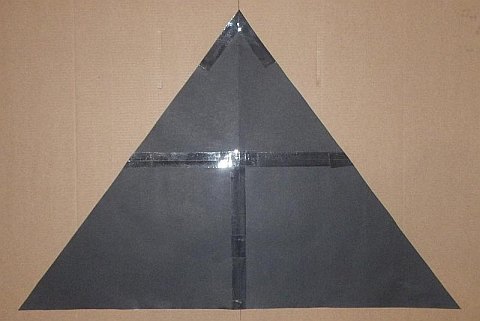 Sail cut out
- With scissors, cut all around the sail shape. There's the completed sail in the photo.
Draw Vertical Guide Lines
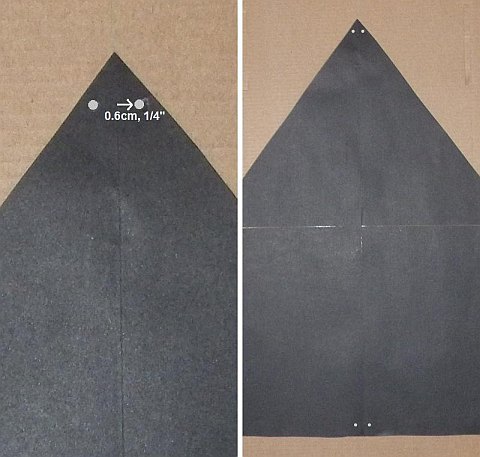 Dots drawn for vertical guide lines
- Lay down the sail so the sticking tape is against the floor.
- Near the top of the sail, make a dot on each side of the centerline, 0.6 cm (1/4 in.) from the line. See the photo on the left up there.
- Similarly, make a pair of dots near the bottom end of the centerline. The photo on the right shows both pairs of dots.
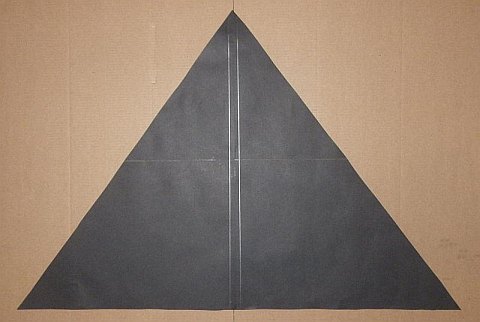 Both guide lines drawn
- Rule two straight lines through all the dots as shown.
Note: The camera flash has made the ends of the lines faint in the photo above.
Draw Leading Edge Guide Lines
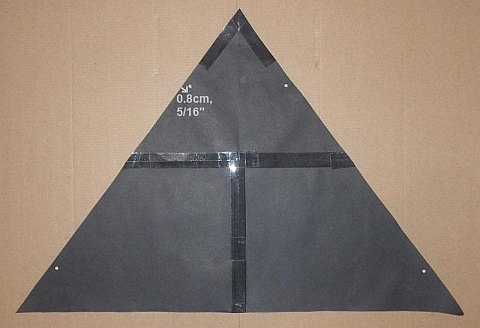 Dots marked near leading edges
- Flip the sail over and mark four dots, each one 0.8 cm (5/16 in.) from the edge of the paper. The distances in from each end of the paper edge can just be approximate. Use the photo as a guide.
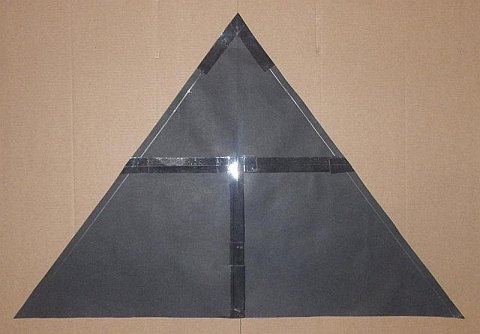 Lines drawn through dots
- Rule a line through each pair of dots as shown. Did you make them close enough for your 30 cm (12 in.) ruler to reach? ;-)
Note: The lines go all the way to the bottom of the sail although they are a little faint in parts of the photo.
Draw Horizontal Guide Lines
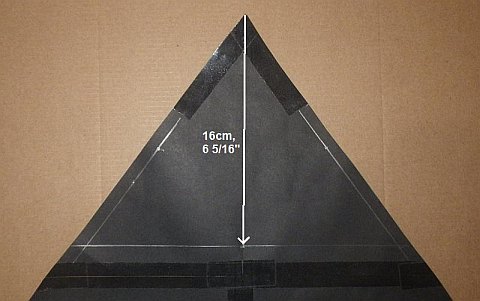 Line drawn out to sides
- Mark a dot on the centerline, 16 cm (6 5/16 in.) from the nose end.
- Using your ruler, draw a horizontal line through the dot and out to each side of the sail shape. Take care to keep the line parallel to the horizontal join line of the sail.
 Dots marked above and below the line
- Mark dots, 0.8 cm (5/16 in.) away from the line near the paper edge, above and below where the guide lines cross. See the photo.
- Also mark dots, 1.1 cm (7/16 in.) away from the line, in the middle of the sail.
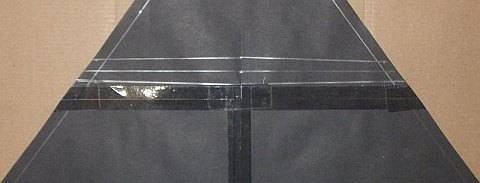 Spar guide lines drawn through all the dots
- Using your ruler, draw lines through all the dots as shown in the photo.
The Vertical Spar
Measure Rectangles
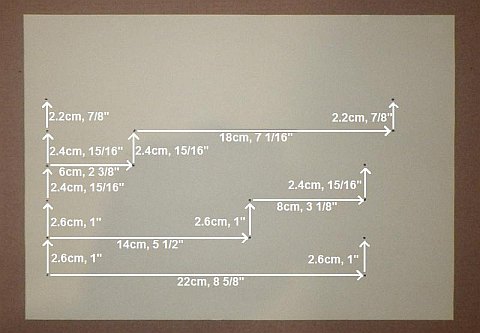 Measured and dots marked
- Measure and mark dots where indicated in the photo. It will be helpful to lightly rule some long horizontal lines first, at the indicated intervals.
Note: The distances to the edges of the paper don't matter. Just measure as indicated from bottom left.
Draw Lines
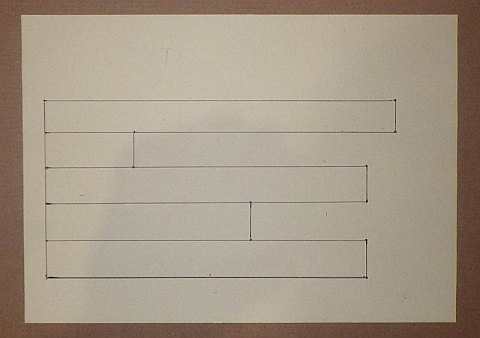 Lines drawn between dots
- Using your pen and ruler, connect the dots as shown.
Tape Over
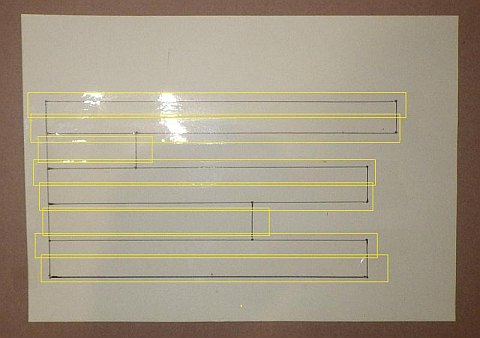 Rectangles taped
- Lay strips of sticking tape over the rectangles as illustrated in the photo.
- The strips of tape can overlap slightly and should cover the rectangles completely. That's all that matters, so don't fuss over the detail!
Cut Out
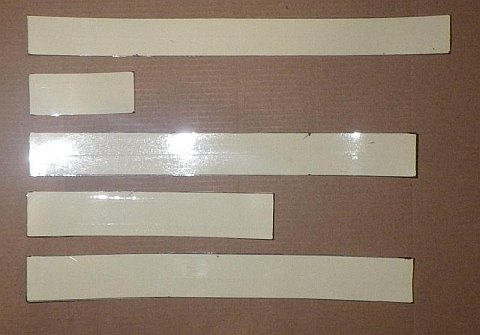 Rectangles cut out
- Cut out the rectangles, which will be totally covered in tape on one side. Some curl is OK as you can see in the photo above.
Stick Together
 Shorter rectangles butt joined
- Lay down the two widest rectangles with taped sides facing the floor, butted together as shown at the bottom of the photo. The one on the left is 22 cm (8 5/8 in.), while the shorter one is 14 cm (5 1/2 in.).
- Similarly, lay down the two next widest rectangles together. The one on the left is also 22 cm (8 5/8 in.), while the shorter one is 6 cm (2 3/8 in.).
- Lay tape across each join, as shown, before wrapping the overhanging tape around to the other side.
Note: Use a ruler or other long straight edge to verify the rectangles are perfectly lined up before applying the tape!
 Shorter piece goes on top then taped at each end
- Still keeping the tape-covered sides facing down, place the shorter butt-joined piece on top of the other butt-joined piece. The shorter one is slightly narrower, so try to center it over the wider piece.
- Align the two pieces at the right-hand end, and put a short strip of tape around to hold them there. There should now be 8 cm (3 1/8 in.) between the edges at the other end.
- Tack the free end of the overlying piece down with a piece of sticking tape as indicated in the photo.
 Last rectangle goes on top
- The remaining rectangle is thinner again. Position it taped side down and center the long edges before tacking in place with squares of tape as shown. This time the distance from the end at left should be 12 cm (4 3/4 in.). See the photo.
Encase in Tape
 Tape laid down over one long edge
- Lay a strip of sticking tape the full length of the layered piece. Leave half the width overhanging as indicated in the photo.
 Tape folded around a long edge
- Fold the overhanging tape around so it sticks to the other side. Doing it all at once with one strip of tape can be tricky, so consider using two or three strips of tape instead. A little bit of overlap is OK.
 Tape laid and folded around other long edge
- In the same way, cover the other edge of the paper with tape and fold around. The three layers of paper should now feel like one solid piece.
- Trim off any excess folded tape at either end with scissors.
As mentioned earlier, there's more kite making on this site than you can poke a stick at. :-)
Want to know the most convenient way of using it all?
The Big MBK E-book Bundle is a collection of downloads—printable PDF files which provide step-by-step instructions for many kites large and small.
That's every kite in every MBK series.
