- Home Page
- Better Kites
- ... Delta Kite
How to Build a Delta Kite
Step by Step—Page 2 of 4
The MBK 2-Skewer Delta
How to Build a Delta Kite
Sail
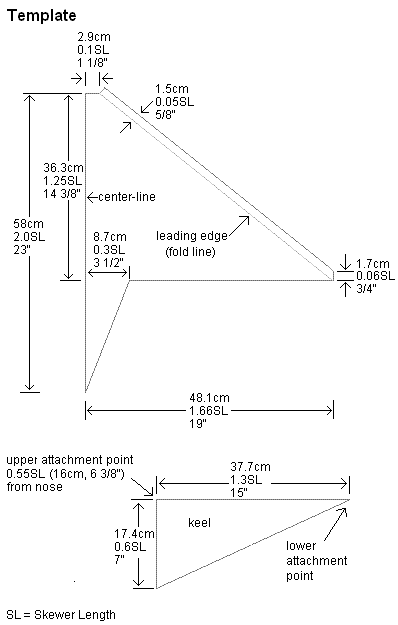
The template shown above represents one side of the kite sail. You will now transfer these measurements to the sail plastic as follows:
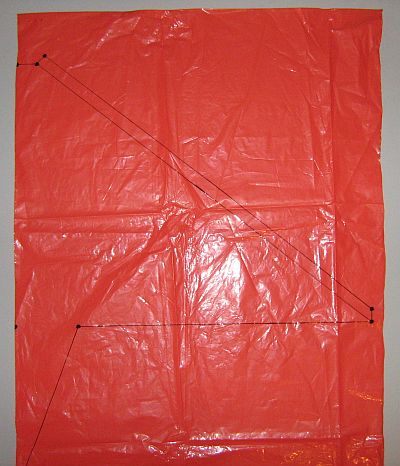
Note: I've made the dots much bigger than they need to be, just so they show up easily in the photo. By the way, there should be a dot on the centerline, right near the bottom—but the photo cuts it off.
- First, mark the the top dot on the centerline, then lay the vertical spar down beside the plastic, and mark the bottom dot.
- Measure 1.25 SL (36.3 cm, 14 3/8 in.) down from the top dot, and mark the middle dot.
- Next, mark each end of the fold line plus the mark which is part way along the trailing edge as in the photo. Judging the 90-degree angle by eye is quite OK, since any small error will be exactly the same on the other side.
- Lay a leading edge spar over the fold line, and shift the lower dot a little if necessary so the fold line is exactly the same length as the bamboo spar.
- Next, mark the two corners of the long narrow flap along the leading edge; after seeing what 0.05 SL (1.5 cm, 5/8 in.) looks like, just put these dots in by eye.
- Finally, rule lines between the marks as in the photo.
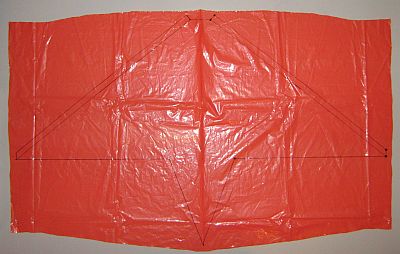
- Flip the plastic bag over, and trace over all the black lines using your marker pen and ruler.
- Cut out a roughly rectangular section of the bag containing the kite sail, open it out, and lay it flat on the table; you can now see the complete sail outline as in the photo.
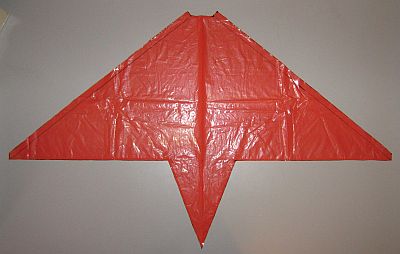
- Lay a piece of clear sticking tape along the short nose section, with the line showing through the center of the tape, but avoid getting any tape on the fold line.
- Lay four pieces of clear sticking tape along the trailing edge, with each line showing through the center of the tape—again, avoiding the fold line.
- With scissors, cut all around the sail outline.
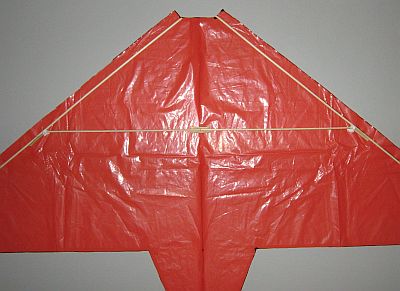
Is the glue on all the bamboo spars dry? If so:
- Place the leading edge spars (the ones with just one short reinforcer) over the fold lines, with the reinforcers facing the centerline.
- Lay one of the remaining spars over the two leading edge spars so it crosses them at the top end of the two reinforcers; this will be the spreader.
- Making sure the spreader is centered over the sail centerline, make marks where it crosses the leading edge spars.
- Next, snip off the ends of the spreader at those marks.
- Check the fit again, since you will probably have to snip a few more times to get it just right; the tips tuck neatly in, with the spreader lying flat against the table.
- When it all looks good, drip on some wood glue as in the photo.
Now wait for this to dry!
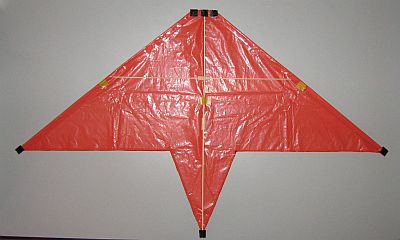
The black pieces of electrical tape mentioned below should all be roughly three times longer than they are wide. You can't see the full length in the photo, since they are folded under.
- Place the remaining spar over the centerline of the sail and underneath the spreader. This is the vertical spar.
- Secure the upper end of the vertical spar to the sail with a piece of electrical tape, wrapping it under to the other side of the sail.
- Secure the lower end of the vertical spar to the sail with a similar piece of electrical tape, wrapping it under to the other side of the sail as before. Gently pull any slackness out of the sail as you do this.
- Next, fold the sail over the leading edge spars, and cap the tips with black tape as in the photo; the tape should be folded around the tip of the spar so it can't slip through the plastic.
- Add more tape like the yellow pieces in the photo, right over top of the short reinforcers.
- Add four long pieces of clear sticking tape to complete the taping down of the sail near the leading edges of the kite.
- Secure the spreader to the vertical spar using drops of glue where they cross.
- If you want to, trim any bits of tape that stick out, with scissors.
As mentioned earlier, there's more kite making on this site than you can poke a stick at. :-)
Want to know the most convenient way of using it all?
The Big MBK E-book Bundle is a collection of downloads—printable PDF files which provide step-by-step instructions for many kites large and small.
That's every kite in every MBK series.
