- Home Page
- Kite Plans
- Boxes
Box-Kite Plans
For the MBK Box Kites
These box-kite plans are aimed at the more experienced kite maker. They summarize the far more in-depth instructions to be found in the How To ... pages for the Dowel and Skewer Series box kites.
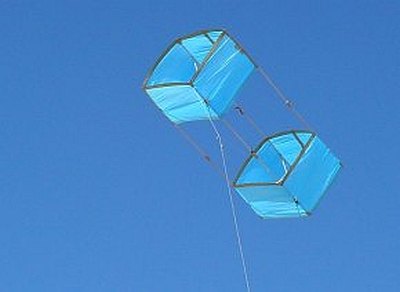 MBK Multi-Dowel Box
These plans assume that you have the knowledge to do a neat job, use the right knots, and keep the weight down!
On this site, there's more kite-making info than you can poke a stick at. :-)
Want to know the most convenient way of using it all?
The Big MBK E-book Bundle is a collection of downloads—printable PDF files which provide step-by-step instructions for many kites large and small.
That's every kite in every MBK series.
Dowel Box-Kite Plans
Tips and Hints
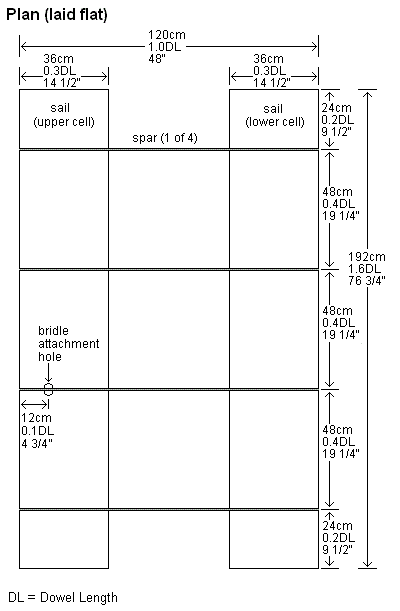
- For the dimensions in the plan, use 5 mm (3/16 in.) diameter hardwood dowel for the spars and cross-pieces. For added strength in flight, you can use 6mm dowel for the long cross-pieces. Any light plastic sheet will do for the sail.
- Use a single long strip of clear sticking tape along each long edge of both pieces of sail plastic. Besides to reinforcing the edge, this also attaches the spars to the plastic.
- Close the box using clear sticking tape along the short edges of the plastic. Also, fold a short length of tape around the leading edge and trailing edge of both joins to reinforce.
- Reinforce the sail at each tip of each main spar, with small squares of packing tape. These caps, folded onto both sides of the sail, will prevent the spars from slipping through the edging tape.
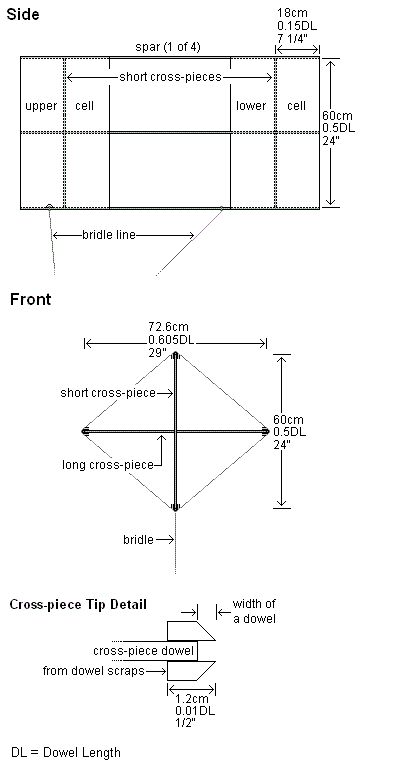
- Cut off two short and two longer dowel cross-pieces, using wood glue and spare dowel to make the tips as shown above.
- Tie a length of shoelace to the middle of both short cross-pieces. Each pair of cross-pieces can then be secured together at the crossing point for extra strength and stiffness during flight.
- Insert and secure the cross-pieces as indicated on the plan. You can glue them in place if you want. Otherwise, glue small dowel lugs onto the main spars so the cross-pieces cannot slip along the dowel. Bend each cross-piece a little to remove it when packing away the kite.
- Try a bridle line about 1.5 DL (180 cm, 72 in.) in length.
- With the upper bridle leg attached and angled as shown, the kite should be trimmed well. Feel free to experiment with sliding the flying-line attachment point fore and aft a little from this position. Secure both bridle attachment knots with a small dob of glue so they don't slide along the dowel.
- This design is lightly built for light-to-moderate winds only! It's a fantastic flyer in those conditions and will respond to thermals.
- No tail should be necessary.
The MBK Dowel Box kite in flight:
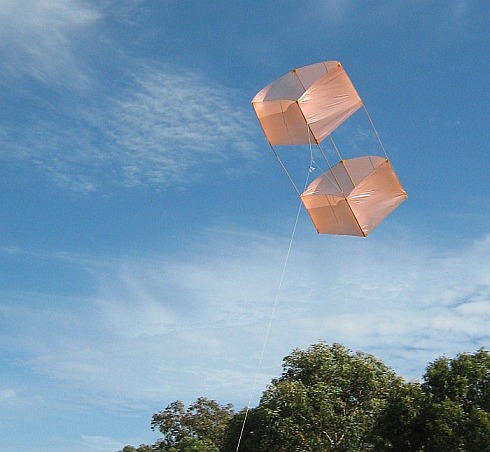 Not all box kites are made for strong wind
2-Skewer Box-Kite Plans
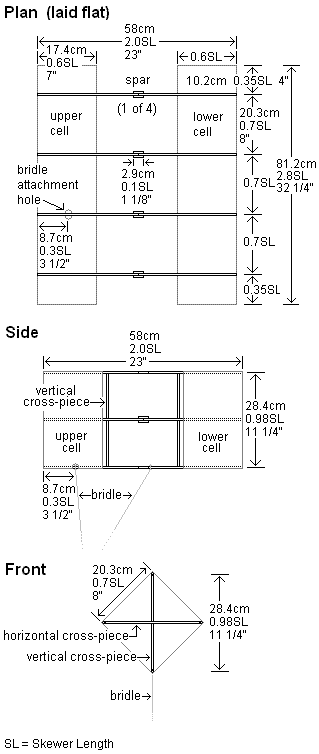
Tips and Hints
- Use a single strip of clear sticking tape over the long edges of both pieces of sail plastic. This will reinforce the edge and at the same time attach the skewers to the plastic. Each main spar is two skewers with points removed, butted end to end and reinforced with two short lengths of skewer glued on.
- Close the box using clear sticking tape along the shorter sail plastic edges. Also, fold a short length of tape around each end of both joins to reinforce.
- Reinforce the sail at each tip of each main spar, with small squares of insulation tape. These caps, folded onto both sides of the sail, will prevent the spars from slipping through the edging tape.
- Insert and secure the two vertical cross-pieces—one near the upper cell and one near the lower cell, both butted onto the same two spars. Hold in place with insulation or packing tape squares folded over the main spar and onto the cross-pieces.
- Cut the other two cross-pieces slightly oversize, then trim down to fit before securing them onto the other two spars in the same way.
- Try a bridle line about 3.0 SL (87 cm, 35 in.) in length.
- Poke a hole through the plastic for the upper bridle attachment, then add a short strip of clear sticking tape just forward of the hole as reinforcement. Secure the lower bridle attachment knot with a small dob of glue.
- This design just loves moderate-to-fresh wind, for which no tail should be necessary.
- Due to its small size, it is convenient to attach the cross-pieces permanently to the spars with glue. You can use paper gussets or very short lengths of skewer along with the gluing to achieve more strength in the joins.
Here's the MBK 2-Skewer Box kite in flight on an almost overcast day:
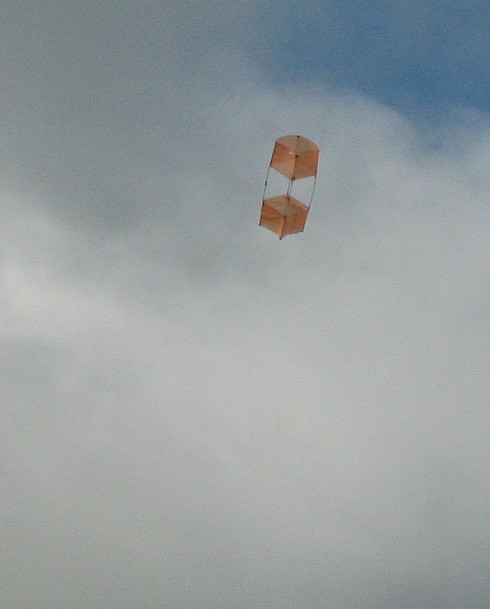 This little box kite will take a lot of punishment
1-Skewer Box-Kite Plans

Tips and Hints
- Use a single strip of clear sticking tape along the longer edges of both pieces of sail plastic. This will reinforce the edge and at the same time attach the skewers to the plastic.
- Close the box using clear sticking tape along the shorter sail plastic edges. Also, fold a short length of tape around each end of both joins to reinforce.
- Reinforce the sail at each tip of each main spar, with small squares of insulation tape. These caps, folded onto both sides of the sail, will prevent the spars from slipping through the edging tape.
- Insert and secure the vertical cross-piece.
- Cut the horizontal cross-piece slightly oversize, then trim down to fit before securing it to the two side spars. Apply a little glue where it crosses the vertical cross-piece.
- Tie some flying line between the two side-spars, attached where indicated on the plan (side view). Use a couple of Half-Hitches to hold a little tension in the line, before securing the knot with glue. This is an unusual box kite design, but it saves weight!
- Poke a hole for the bridle attachment, then add a short strip of clear sticking tape just forward of the hole to protect the plastic.
- Try a tail about 6.0 SL (175 cm, 70 in.) long, looped around and attached at both ends to the lower cell where indicated. Experiment with reducing the amount of tail later.
- This little kite flies best in moderate winds.
Here's the MBK 1-Skewer Box kite in flight:
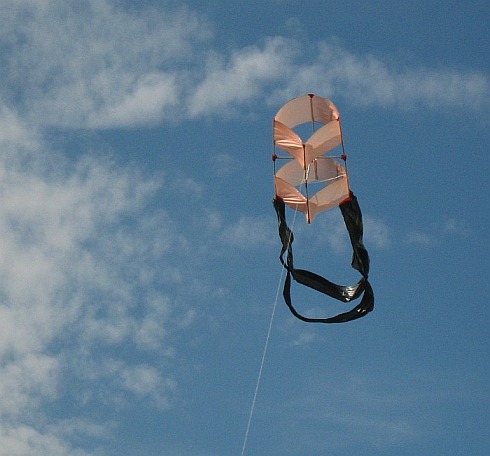 Needs a bit of tail but fun to fly in moderate winds
Out in the Field
Box-kite stories of my real-life flying experiences are worth checking out!
They're illustrated with photos and videos, of course.
I hope you've had fun using these box-kite plans. Did it fly well? Great!
As mentioned earlier, there's more kite making on this site than you can poke a stick at. :-)
Want to know the most convenient way of using it all?
The Big MBK E-book Bundle is a collection of downloads—printable PDF files which provide step-by-step instructions for many kites large and small.
That's every kite in every MBK series.
