- Home Page
- Simple Kites
- ... Diamond Kite
How to Build a Diamond Kite
Step-by-Step—the MBK Simple Diamond
Learn how to build a diamond kite with these easy-to-follow instructions—fully illustrated with photographs, every step of the way. And there's a flying video at the end.
Don't worry about how long this page looks.
The steps are easy, hence this simple diamond kite comes together very quickly!
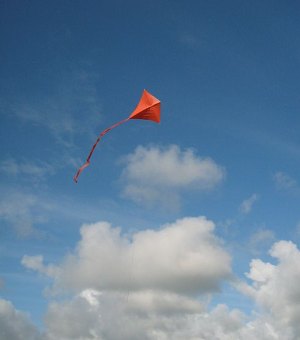
Sometimes I went out with my (then) young son to fly this kite. A classic picture of father and son, out flying a kite!
Like nearly every diamond, it's very reliable and easy to handle in flight. Watch it wing-waggle and swoop occasionally, staying up as long as the wind blows.
The tail is simplicity itself—just a long, slim rectangle of the same plastic you use for the sail. For more stability in fresh winds, it's easy to just add on a bit more length to the tail.
50-pound line is the ideal strength for this kite.
(Regarding that pinnable image—it's much bigger when pinned.)
On this site, there's more kite-making info than you can poke a stick at. :-)
Want to know the most convenient way of using it all?
The Big MBK E-book Bundle is a collection of downloads—printable PDF files which provide step-by-step instructions for many kites large and small.
That's every kite in every MBK series.
1. How to Build a Diamond Kite
Measuring the Sail
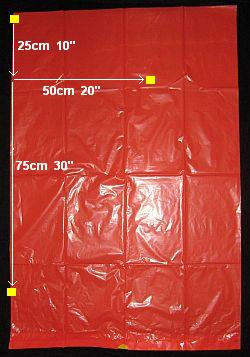
A quick look at the materials and tools for making this kite might be a good idea, first. Then just click the Back button on your browser to get back here.
- Place your plastic bag flat on the floor with the closed end at the top.
- Starting
from just below the top-left corner of the bag, measure and mark three dots
on the plastic. I've highlighted the dots in yellow in the photo.
Judge the horizontal and vertical directions by eye. If you're careful,
there's no need for a T-square.
2. How to Build a Diamond Kite
Cutting the Sail
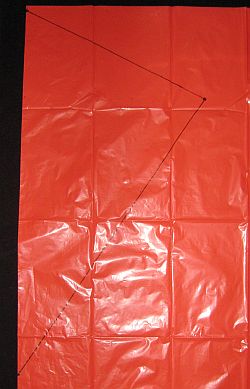
- Take your ruler and connect the dots with the black marker pen as shown in the photo. (OK, the lines appear a bit faint in the photo!)
- Flip the plastic over, and trace over all the black lines.
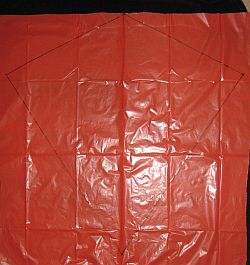
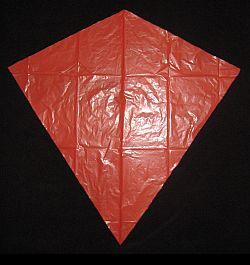
- Cut along the top and right side of the bag, and open it out to show the complete sail outline as in the first photo.
- Take your scissors and cut along all the black lines. As in the second photo, your diamond kite sail is nearly complete!
3. How to Build a Diamond Kite
Adding the Spars
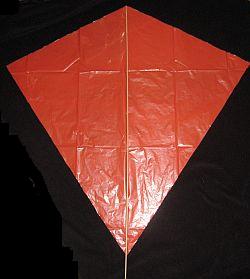
- Lay a length of your 5 millimeter (3/16 inch) dowel down the centerline of the sail, line it up with the top sail-corner, and saw it off at the bottom corner. See the first photo, above, where the dowel has not yet been cut.
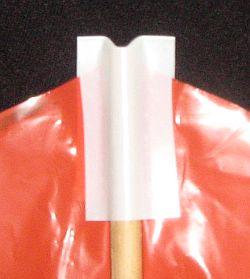
- Cut off a 5 centimeter (2 inch) length of insulation tape, and stick down the dowel to the plastic. See the second photo.
- Do the bottom end of the dowel the same way.
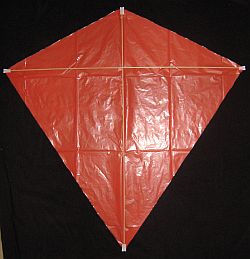
- Do the other dowel similarly so the kite looks like the third photo.
Note: After flying this kite for several months, I decided to recommend you add another piece of tape to the top corner of the sail, at right angles to the first tape—for added strength!
4. How to Build a Diamond Kite
Attach the Flying Line
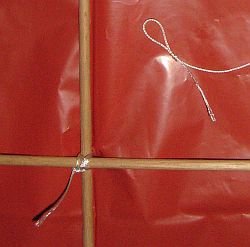
- Poke a hole in the plastic sail, right over where the dowels cross each other.
- Thread the free end of your flying line through the hole, and tie it firmly around the crossing point as in the photo. Ignore the loop in the photo, unless you want to make a simple bridle like I did.
5. Rather Important!
Attach the Tail
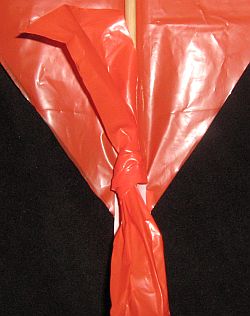
- From spare scraps of sail plastic, make up a long, narrow strip no shorter than five times the length of the kite itself. The strip should be about 5 centimeters (2 inches) wide.
- Thread one end of the tail around the bottom of the vertical spar as you can see in the photo. Tie the tail to the dowel with a simple knot.
And Now—FLYING!
I hope you enjoyed learning how to build a diamond kite. There's ours in the photo above, flying around on a perfect day for it.
Click/tap the photo to see a bigger, higher-res version.
That's it; you're ready to fly. Take the kite out whenever you can see leaves moving in the trees or bushes. If it won't stay up, try letting out plenty of line and then towing it up at jogging pace. It might find enough wind higher up.
With plenty of wind, this kite will waggle from side to side, so make sure all the tip tapes are pressed down firmly and secure. I had one let go once, which brought the kite down suddenly. With some spare tape I had handy, the sail tip was soon fixed, and the diamond waggled straight back up to full flying height.
Flight Reports From Other Visitors
Click below to read about various kite-flying adventures, contributed by other visitors to this page...
Tiny Light Wind Newspaper Kites
As a child (around 6) one of my parent's friends with children near my age took us outside and taught us how to make the smallest of light-wind kites from …
Simple Dowel Kites at a Cub Scout Camp
My son is a cub scout and we were invited to attend a "family camp". Parents were asked to arrange activities for the cubs that would contribute towards …
Easy. Cheap. and Fun as Fudge
I am 15 and had to make a kite for my math class (following it's geometric meaning and characteristics and all that), and I made this kite in 1-2 hours. …
Black Diamond
We had a kite derby for cub scouts. We made a sail kite and a box kite in the two weeks we had to prepare for it. Both crashed and burned during their …
Best Kite I've Ever Had!
My son got a cheap kite as a gift for his 6th birthday, and it broke in about 20 seconds. He was very disappointed, so I decided to build one.
With …
We Have a Winner!
I helped my 11 year old son build this for his class project in science as he was studying the principles of flight. Half of the grade was design, the …
Terrific!
My son and I made this kite as part of a school project and were amazed with the results. It flew perfectly from the start - I was truly impressed!
…
First Ever Go at Making a Kite!
:) This is my first go at making a kite, and I'm stoked!
I've been flying now for a couple of years, bought kites, single and dual. But for some reason …
As mentioned earlier, there's more kite making on this site than you can poke a stick at. :-)
Want to know the most convenient way of using it all?
The Big MBK E-book Bundle is a collection of downloads—printable PDF files which provide step-by-step instructions for many kites large and small.
That's every kite in every MBK series.


