- Home Page
- How To Fly
- Homemade Kite
Your Homemade Kite
Tips From Experience!
This page is not a set of instructions on how to construct a homemade kite. Rather, it is a small collection of tips on how to ensure that a simple homemade kite ends up flying high and stable.
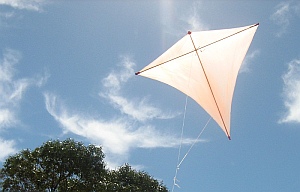
 MBK Dowel Diamond, backlit by the sun
I've made quite a few as you can probably tell from some of those e-book covers displayed on this site.
Although some knowledge about basic aerodynamics is handy, nothing beats bitter experience! I hope these tips ensure that there is a minimum of bitterness in your experience.
These general points only relate to flat single-line kites, including those with bowed spars or dihedral. So much depends on symmetry.
Symmetry is how closely the left and right sides of the kite are exact mirror images of each other in various ways.
Get a coffee, since this page is a little long—but interesting, I hope!
On this site, there's more kite-making info than you can poke a stick at. :-)
Want to know the most convenient way of using it all?
The Big MBK E-book Bundle is a collection of downloads—printable PDF files which provide step-by-step instructions for many kites large and small.
That's every kite in every MBK series.
Symmetry in Sail Shape
This is important. In other words, sail shape on one side is an exact mirror image of the shape on the other side. This also guarantees that the sail area is precisely the same on both sides. In practice, we can't be perfect, but there are ways to do a very good job with a homemade kite.
For example, by folding the sail material down the centerline before measuring and cutting, a kite can be made very symmetrical in shape. This gets a homemade kite off to a great start, although other things can still go wrong.
The stronger the wind, the more a sail-area imbalance will show up, making the kite go left or right or even loop continuously.
Sometimes, with kites put together with tape, the sail can go out of balance while the kite is flying. The sail might have slipped along a spar or become partly detached, causing one side to have more area than the other. This is easily fixed!
Symmetry in Sail Billow
I discovered this one day when trying to figure out why a small simple diamond wouldn't stay in the air, despite having a long tail. It was accurately made and reasonably light. Finally, I had a good look at the sail while I swished it around indoors—not on a line! I just held the tail end of the kite in my hand and moved it around to get some air pressure in the sail. I noticed that one side was fairly taut, but the other bagged out a lot more; no wonder it wouldn't fly!
If you make a fairly big kite, this is unlikely to happen. However, with a very small homemade kite, all sorts of inaccuracies can creep in. Anyway, I reattached one corner of the sail to tighten everything up, and the kite flew fine after that!
Symmetry in Flexibility
 MBK 2-Skewer Barn Door
A subtle one, this is! Everything looks right, balances right, but when the wind picks up... Around and around goes your homemade kite, all the way to the ground. The cause is that one side of the kite is bending more than the other! The effective sail area of the bendy side is slightly reduced, which means your beautifully symmetrical sail ain't so symmetrical anymore!
Depending on the design of kite, there might be other aerodynamic effects too, as the flying surfaces distort. Whatever they are, the effect is the same—looping, or at least an annoying tendency to dive to the same side all the time.
Synthetic materials like fiberglass or carbon fiber aren't likely to give problems in a homemade kite, but natural materials are. The solution is to do a quick check of flexibility when selecting material for the horizontal spars. Lay a couple of sticks on a table, with most of the length hanging over the edge. Does one stick droop noticeably more than the other? Select a couple of sticks that match better, and the resulting kite should have a respectable wind range.
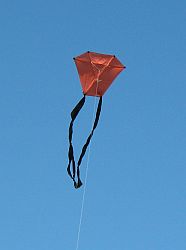
Kites with multi-point bridles like the barn door have an advantage, since cross spars are attached at more than one point. There is less tendency to bend. In fact, that's my original 2-Skewer Barn Door in the photo up there.
Symmetry in Weight
If the sail on a homemade kite is good, then fitting spars to it should result in good balance. However, spar material is never exactly the same from end to end. The synthetic stuff comes pretty close, though! So when using natural materials, it's a good idea to make some attempt to get a match between the left and right ends of the horizontal spars. Just looking at two spars can often give a clue. If one one is noticeably thicker or darker than the other, for example, chances are they don't weigh the same!
Also, when the kite is completely made, there might still be a small imbalance for some reason unrelated to the spars. For example, it could be due to the spar caps or sail edging. For my MBK kites, that boils down to the exact amount of tape I use!
From my experience, this might be the least important aspect of symmetry. It seems to have the most effect at the bottom end of the kite's wind range. Also, I've found that high-flying designs like the delta are more sensitive to being correctly balanced in this way than other less efficient kites. Anyhow, balancing the kite is easy to do with a few small bits of tape. It's a nice feeling, knowing that your homemade kite is in nearly perfect balance!
Your Homemade Kite
The Lighter the Better!
It's hardly surprising, but did you know that this can have a big effect on stability as well as performance?
If there is too much weight near the edges of the sail and/or the spar tips, the kite will want to keep going around, if it starts to rotate for some reason. Rough air, for example, or a little gust from the side might tip it one way or the other. The natural stability of the kite might not be quite enough to overcome this inertia at times, causing it to loop around or dive into the ground.
Light weight will also help the kite go as high as possible. That sounds logical! This is because the lifting force of the kite has to lift two things against gravity—the flying line and the kite itself. Saving weight on the kite means that you can let out more flying line before you reach the maximum weight that the kite can lift.
So save weight where you can! Pick sail material that is strong enough but light as possible. Use a minimum of tape or glue or whatever other means you are using to secure the materials together. Use spars that are only just stiff enough for the job. You will see all these principles employed in the designs in that e-book bundle.
Fly Higher With a Light Line
Use the lightest flying line possible, while making sure it is still strong enough to avoid losing the kite. A rough rule of thumb is to multiply the sail area in square feet by three, which gives the required breaking strain of the line in pounds. I tried this calculation on a couple of my 2-Skewer kite designs, and it turned out the 20-pound twisted Dacron we used was just right!
The rule of thumb is fine for wind strengths up to "fairly fresh." If you have a homemade kite capable of riding out a gale, you had better double the line strength at least, before flying in those sort of conditions!
The more flying line you let out, the bigger the load the kite is trying to carry, in addition to its own weight. Hence the lighter the line, the higher the kite can fly before it reaches its weight limit.
The Less Billow the Better
We've seen how uneven billow can be a problem. Well, any billow at all will affect the performance of most flat kites, whether left totally flat or bowed or made with dihedral. The word flat sort of gives it away, doesn't it! To illustrate this, one of my little barn door kites became totally unstable after a lot of flying, when a bit of stretch and/or slippage occurred in the sail. After tightening it up, this homemade kite magically started flying well again.
Here lies one of the biggest advantages of special kite-making sail material over thin plastic. The expensive stuff doesn't stretch nearly as much!
There is one notable exception—the delta kite. A conventional delta needs a certain amount of billow in its sail to fly properly. Another exception is a tailless variation on the diamond kite which deliberately introduces some billow near the tail end. This forms a kind of keel and helps to keep the kite stable.
Multi-point Bridle Adjustments
Of course, if a bridle has lines going off to the left and right of the kite, everything needs to be symmetrical. Or does it? I've found it's very handy to make some of these bridle knots shiftable so if the kite goes left or right, you have another option for correcting the problem. I'm talking about knots which can shift left or right across the kite, rather than up and down as with adjusting the towing point.
Another reason for making them shiftable is so you don't have to be perfectly accurate with tying a permanent knot in the exact correct position. If a shiftable knot is off a bit, it's easy to slide it to the correct spot! Also, I've never had a problem with one of these knots shifting while the kite is flying.
That's about it for making a homemade kite which flies straight and high over a wide range of wind speeds.
 Original 1-Skewer Delta
I hope you have a great time building and flying your homemade kite!
If you have already tried making a kite and it has a disappointing wind range, check it off against all the points above. The solution might be simple, like tightening the sail a bit. Or you might discover you have a bendy spar on one side and therefore have to make a new kite!
Here's one little last resort tip:
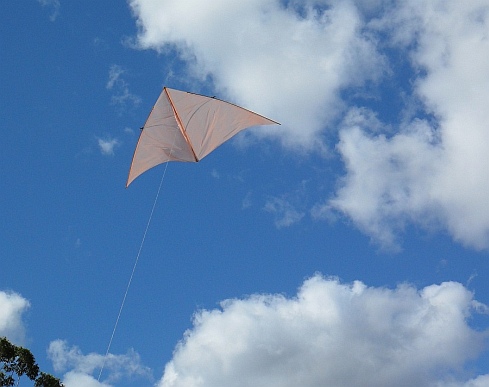
If your homemade kite has a tendency to turn in one direction and you can't fix it, try adding a tiny tail on one wing tip! The faster the tip moves, the more it drags, so this has a stabilizing effect. I actually did this on a 1-Skewer Delta to trim it better. It was surprising how little tail was required, but it certainly did the trick. There it is in the photo.
Down below is a photo of our much larger Dowel Delta kite. The leading edges are 1.2 meters (4 feet) of 5 mm (3/16 in.) dowel.
 MBK Dowel Delta
The video below is of our Dowel Rokkaku kite. This design is wonderfully
stable and predictable. Like the delta, it is also a hoot to fly on
light-wind days!
As mentioned earlier, there's more kite making on this site than you can poke a stick at. :-)
Want to know the most convenient way of using it all?
The Big MBK E-book Bundle is a collection of downloads—printable PDF files which provide step-by-step instructions for many kites large and small.
That's every kite in every MBK series.
